
IP-Upload v1.1.1 serial key or number

IP-Upload v1.1.1 serial key or number
List of RFCs
Overview
The RESTful Interface Tool is a command-line interface that allows you to manage Hewlett Packard Enterprise products that take advantage of RESTful APIs. For this release of the tool, you can manage HPE Gen9 servers running iLO 4 2.10 or later through iLO RESTful APIs. You can install the tool on your computer for remote use or you can install the tool locally on a server with a Windows OS or Linux OS. In addition to using the tool manually to execute individual commands, you can create scripts to automate tasks.
The RESTful Interface Tool can display and set parameters for the following:
- HPE BIOS/UEFI (including secure boot)
- HPE iLO 4/iLO 5
- HPE iLO Repository
- Smart Array support
Requirements
The requirements for the server, which you will manage with the tool, are as follows:
- Local management: Gen9 or greater server with a Windows OS or Linux OS (64–bit) installed.
- Remote management: Gen9 or greater server with or without an OS installed.
- iLO 4 2.10 or later.
- Before you run the tool on a Linux system, the /tmp folder must be configured to allow code to execute. If the /tmp folder is set to no-execution, the tool will not run. You can work around this by exporting an environment variable to point to another location. You can assign a new location to any of the following environment variables: TMPDIR, TEMP, TMP.
Note: You can download the install packages from http://www.hpe.com/info/resttool.
Installing the RESTful Interface Tool
Perform the following steps to install the tool in a Windows OS or Linux OS.
Windows
- Download the RESTful Interface Tool (Windows MSI package) from http://www.hpe.com/info/resttool.
- Install the package on the server you prefer to manage for local management. For remote management, install the package on a laptop or server that has access to the managed server network.
Linux
- Download the RESTful Interface Tool (Linux RPM package) from http://www.hpe.com/info/resttool.
- Install the installation package on the server you prefer to manage for local management. For remote management, install the package on a laptop or server that has access to the managed server network.
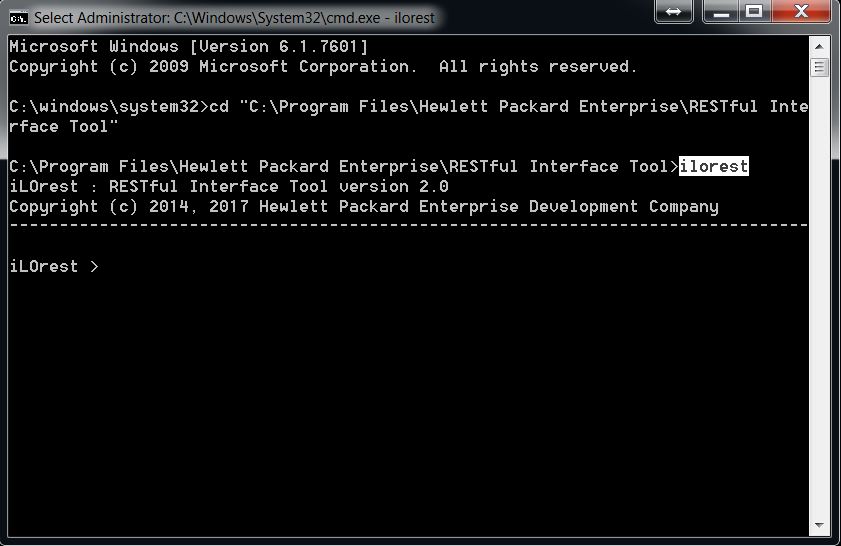
Starting the RESTful Interface Tool
Windows
- Click the Start menu.
- Click Hewlett Packard Enterprise → HPE RESTful Interface Tool.
- Right-click the HPE RESTful Interface Tool prompt, and then click Run as Administrator.
Linux
- Open a terminal window.
- Run the following command as an administrator to start interactive mode:
RESTful Interface Tool Modes of Operation
The RESTful Interface Tool has three modes of operation. By default, the interactive mode is utilized when you start the RESTful Interface Tool. With scriptable mode, you can use a script that gives commands to the RESTful Interface Tool. The file-based mode allows you to use a script that gives commands to the RESTful Interface Tool and uses a file to load and save settings.
Interactive Mode
Interactive mode is started when you run the RESTful Interface Tool without any command-line parameters. The prompt is displayed and you can enter commands one at a time. You can exit the interactive mode by entering the command at the prompt. On Windows systems, double-click to start an interactive session. You must be an administrator to run .
Tab complete
Tab complete is available for interactive mode in multiple capacities. See the features below.
Commands
Tab complete is available for viewing and completing commands.
Types
Tab complete is available for viewing and completing types.
Properties and sub-properties
Tab complete is available for viewing and completing properties.
- You must be logged in and have a type selected
- Also available for set and list
Schema information for properties
Tab complete can also show schema information for properties.
- You must be logged in and have a type selected
- Also available for set and list
Scriptable Mode
:: This is a batch file that logs into a remote server, :: selects the Bios type, and gets the BootMode value :: Usage :: :: selectget.bat [URI] [USERNAME] [PASSWORD] @echo off set argC=0 for %%x in (%*) do Set /A argC+=1 if %argC% LSS 3 goto :failCondition goto :main :failCondition @echo Usage: @echo selectget.bat [URI] [USERNAME] [PASSWORD] goto :EOF :main @echo ***************************************** @echo ************* Logging in... ************* @echo ***************************************** ilorest.exe login %1 -u %2 -p %3 @echo ***************************************** @echo ******* selecting Bios type... ******** @echo ***************************************** ilorest.exe select Bios. @echo ***************************************** @echo ********** getting BootMode... ********** @echo ***************************************** ilorest.exe get BootMode pauseThe following script retrieves information regarding the Bios type:
You can use the scriptable mode to script all the commands using an external input file. The script contains a list of the RESTful Interface Tool command lines that let users get and set properties of server objects.
In this example, first the type is selected, and then the command is used to retrieve information about the property of .
File-based mode
The following script allows you to save, edit, and load a file to the server.
File-based mode allows you to save and load settings from a file. This is similar to the files used by CONREP. File-based mode supports the JSON format.
When the example script is run, the following result is produced:
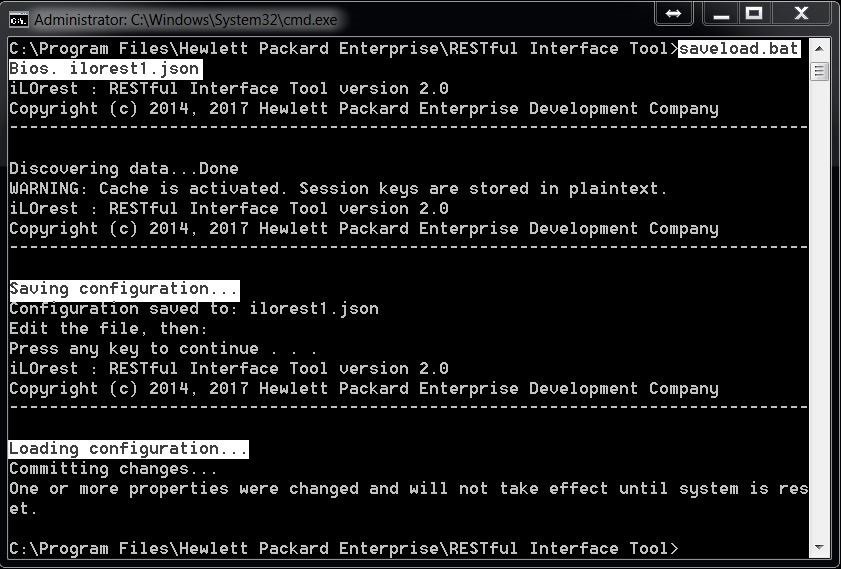
Here, the type is saved to a file called . Then, after you modify any properties, the command is used to make these changes on the server.
The properties of can be edited here, and then loaded on the server. When the file is loaded on the server, changes to read-only values are not reflected. The full list in this example is truncated to save space.
After saving this configuration, the ilorest1.json file looks like this:
Executing commands in parallel
Run the following command to start an iLOrest session in 10 different iLO servers:
When you run the example command, PDSH issues the following 10 commands in batch and background mode. For each command, the iLOrest tool saves the data in a different location. For example, for server1, the data is cached in directory server1, for server2, the data is cached in directory server2.
Now that an iLOrest session is created on each iLO, you can select, set, or get information from them.
The -R exec part of the example finds and locally executes the iLOrest executable. The -w server[1-10] part of the example replaces the string in the rest of the command with .
iLOrest uses a caching method to locally save servers' data. To send iLOrest commands to many different systems at once remotely, you will need to specify a different cache directory for each of them. The following example uses , but any method of parallel scripting will work as long as you are specifying different cache directories.
Running iLOrest on multiple systems locally can be done using automation tools such as Ansible, Chef, and Puppet.
Configuration file (ilorest.conf)
Windows default configuration file
Linux default configuration file
The configuration file contains the default settings for the tool. You can use a text editor to change the behavior of the tool such as adding a server IP address, username, and password. The settings that you add or update in the configuration file are automatically loaded each time you start the tool.
Configuration file locations:
- Windows OS: The same location as the executable file that starts the tool.
- Linux OS:
Higher Security Modes
This section describes how to set higher security modes and how to use the RESTful Interface Tool in these modes.
These security settings are only available in HPE Gen10 servers.Setting iLO Higher Security Modes
After the commit operation has been completed, iLO will reset to apply the changes.To set security modes in RESTful Interface Tool, select the "HpeSecurityService." type, and then set the "SecurityState" property to one of the allowed values and commit.

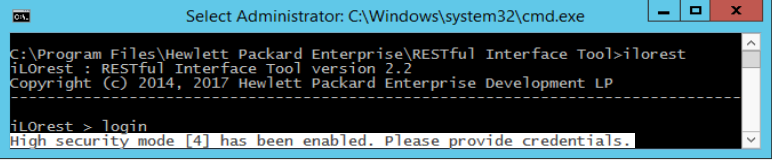
Using RESTful Interface Tool in iLO Higher Security Modes
RESTful Interface Tool in remote mode continues to function normally in higher security modes. To use RESTful Interface Tool locally in higher security modes, you must pass credentials along with your commands.
In interactive mode, you only need to pass your credentials during the login command. In command line mode, you must pass credentials for EACH COMMAND, even if you are already logged in.RESTful Interface Tool functions normally with higher security settings in remote mode.
To use RESTful Interface Tool locally in higher security modes, you must pass credentials to your commands.
If you do not pass the proper credentials in local mode, you receive a similar error.
A note on OS FIPS modes
RESTful Interface Tool 2.2 and greater have OS FIPS support. If an OS is set to enforce FIPS, RESTful Interface Tool uses a FIPS version of OpenSSL.
For users running from source that would like FIPS support, please see this link for information on including this feature.
Global Options
This section lists all global options available.
-h, --help
Including the help flag will display general help for the tool.
-c, --config=CONFIGFILE
Use the provided configuration file instead of the default.
--cache-dir=CACHEPATH
Use the provided directory as the location to cache data instead of the default.
-v, --verbose
Display verbose information.
-d, --debug
Display debug information.
--logdir=LOGPATH
Use the provided directory as the location for the log file instead of the default.
--nocache
During execution the application will temporarily store data only in memory.
--nologo
Include to block copyright and logo.
--proxy=PROXYURL
Use the provided proxy for communication.
--redfish
Use this flag if you wish to enable Redfish only compliance. It is enabled by default in systems with iLO 5 and above.
The --redfish global option is not required for iLO 5.--latestschema
Optionally use the latest schema instead of the one requested by the file.
Might cause errors in some data retrieval due to difference in schema versions.Global commands
This section includes commands as well as their usage and examples of general commands in the RESTful Interface Tool. They include commands used to do things such as listing help for using commands, viewing, retrieving, modifying, and committing changes to server properties, and authenticating and logging in and out of the server.
Help Command
iLOrest > help Usage: iLOrest [GLOBAL OPTIONS] [COMMAND] [ARGUMENTS] [COMMAND OPTIONS] Options: -h, --help Show this help message and exit. -c FILE, --config=FILE Use the provided configuration file instead of the default one. --cache-dir=PATH Use the provided directory as the location to cache data (default location: C:\Users\kocurema\AppData\Roaming\.iLOrest) GLOBAL OPTIONS: -v, --verbose Display verbose information. -d, --debug Display debug information. --logdir=PATH Use the provided directory as the location for log file. --nocache During execution the application will temporarily store data only in memory. --nologo Include to block copyright and logo. --redfish Use this flag if you wish to to enable Redfish only compliance. It is enabled by default in systems with iLO5 and above. --latestschema Optionally use the latest schema instead of the one requested by the file. Note: May cause errors in some data retreval due to difference in schema versions. --proxy=URL Use the provided proxy for communication. BIOS COMMANDS biosdefaults - Set the currently logged in server to default BIOS settings. bootorder - Displays and sets the current boot order. iscsiconfig - Displays and configures the current iscsi settings. pending - Show the pending changes that will be applied on reboot. results - Show the results of changes which require a server reboot. setpassword - Sets the admin password and poweron password COMMANDS commit - Applies all the changes made during the current session. get - Displays the current value(s) of a property(ies) within a selected type. info - Displays detailed information about a property within a selected type. list - Displays the current value(s) of a property(ies) within a selected type including reserved properties. load - Loads the server configuration settings from a file. login - Connects to a server, establishes a secure session, and discovers data from iLO. logout - Ends the current session and disconnects from the server. save - Saves the selected type's settings to a file. select - Selects the object type to be used. set - Changes the value of a property within the currently selected type. status - Displays all pending changes within a selected type that need to be committed. types - Displays all selectable types within the currently logged in server. exit - Exits from the interactive shell. help - Displays command line syntax and help menus for individual commands. Example: help login RAW COMMANDS rawdelete - Raw form of the DELETE command. rawget - Raw form of the GET command. rawhead - Raw form of the HEAD command. rawpatch - Raw form of the PATCH command. rawpost - Raw form of the POST command. rawput - Raw form of the PUT command. SMART ARRAY COMMANDS clearcontrollerconfig - Clears smart array controller configuration. createlogicaldrive - Creates a new logical drive on the selected controller. deletelogicaldrive - Deletes logical drives from the selected controller. drivesanitize - Erase/Sanitizes physical drives factoryresetcontroller - Factory resets a controller by index or location. smartarray - Discovers all storage controllers installed in the server and managed by the SmartStorage. iLO COMMANDS certificate - Command for importing both iLO and login authorization certificates as well as generating iLO certificate signing requests clearrestapistate - Clears the persistent state of the REST API. Some portions of the API may not be available until after the server reboots. directory - Update directory settings, add/delete directory roles, and test directory settings. disableilofunctionality - disables iLO's accessibility via the network and resets iLO. WARNING: This should be used with caution as it will render iLO unable to respond to further network operations (including REST operations) until iLO is re-enabled using the RBSU menu. eskm - Command for all ESKM available actions. factorydefaults - Resets iLO to factory defaults. WARNING: user data will be removed use with caution. fwintegritycheck - Perform a firmware integrity check on the currently logged in server. firmwareupdate - Perform a firmware update on the currently logged in server. iloaccounts - Adds / deletes an iLO account on the currently logged in server. backuprestore - Backup and restore iLO to a server using a .bak file. iloclone - Clone the iLO config of the currently logged in server and copy it to the server in the arguments. ilofederation - Adds / deletes an iLO federaion group on the currently logged in server. ilolicense - Adds an iLO license key to the currently logged in server. iloreset - Reset iLO on the current logged in server. ipprofiles - This is used to manage hpeipprofile data store. onebuttonerase - Performs One Button Erase on a system . reboot - Reboot operations for the current logged in server. sendtest - Command for sending various tests to iLO. serverclone - Creates a JSON formated clone file of a system's iLO, Bios, and SSA configuration which can be duplicated onto other systems. User editable JSON file can be manipulated to modify settings before being loaded onto another machine. serverinfo - Shows aggregate health status and details of the currently logged in server. serverlogs - Download and perform log operations. serverstate - Returns the current state of the server. sigrecompute - Command to recalculate the signature of the computer's configuration. singlesignon - Command for all single sign on available actions. virtualmedia - Command for inserting and removing virtual media. iLO REPOSITORY COMMANDS deletecomp - Deletes components/binaries from the iLO Repository. downloadcomp - Downloads components/binaries from the iLO Repository. flashfwpkg - Flashes fwpkg components using the iLO repository. installset - Manages install sets for iLO. listcomp - Lists components/binaries from the iLO Repository. maintenancewindow - Manages the maintenance windows for iLO. makeinstallset - Creates install sets for iLO. taskqueue - Manages the update task queue for iLO. uploadcomp - Upload components/binary to the iLO Repository.Help example commands:
Entering help will list the global iLOrest options and all available commands.
iLOrest > help login Usage: login [URL] [OPTIONS] To login remotely run using iLO url and iLO credentials example: loginProviding a specific command will list help regarding that specific command.
iLOrest > login -h Usage: login [URL] [OPTIONS] To login remotely run using iLO url and iLO credentials example: loginThe alternate syntax to list details regarding a command is -h.
Syntax
help [command] [optional parameters]
Description
Displays command-line syntax and help menus for individual commands. Use this command if you want to know more about a command or need help using a command. Alternatively, you can use the command without specifying a particular command if you wish to see all the available commands and options.
Parameters
Supplying a command to help will display the help message corresponding to the given command, as well as the options relating to that particular command.
If no command is provided, the help command will list and provide a brief description of all available commands.Running the command with the –h or –help command will display information on how to use the command.
Use the provided configuration file instead of the default one.
Use the provided directory as the location to cache data (default location: ).
Inputs
None
Outputs
None
Login command
iLOrest > login xx.xx.xx.xx -u username -p password Discovering data...DoneLogin example commands:
To login remotely, supply the URL, username, and password for the server.
iLOrest > login xx.xx.xx.xx -u username -p password --select Bios. Discovering data...Done iLOrest > select Current selection: Bios.v1_0_0Here the selector option has been included so that the type is selected once the user is logged in. You can prove that the type has indeed been selected when we enter the select command.
iLOrest > login [xxxx::xxxx:xxxx:xxxx:xxxx] -u username -p password Discovering data...DoneAn IPv4, IPv6, or hostname can be specified. IPv6 should use the following format.
iLOrest > login system.domain.net -u username -p password --https \path\to\SSLcert.crt Discovering data...DoneHere a SSL certificate was included so iLOrest validates the HTTPS connection
iLOrest > login Discovering data...DoneHere the URL, username, and password information are not specified here or in the configuration file, and the server was logged in to locally.
Syntax
login [URL] [User] [Password] [Optional Parameters]
Description
Connects to a server, establishes a secure session, and discovers data from iLO. If you are logging in to a local server, run the command without arguments. If you are not logging in to a local server, supply the URL argument along with the user and password options.
Usage in Other Commands
Login remotely as part of other commands by including the --url, (-u, --user), and (-p, --password) flags. Optionally include the --https flag to validate the SSL certificate when logging in. Locally you will be logged in automatically unless running in higher security modes (see Higher Security Modes).
Parameters
Connect to the server located at the provided URL.
Including the help flag will display help for the command.
Connect to the server as the provided user.
Connect to the server with the password corresponding to the given user.
Use the provided CA bundle or SSL certificate with your login to connect securely to the system in remote mode. This flag has no effect in local mode.
Optionally choose to set the includelogs flag. Doing so will include logs in the data retrieval process.
Use this option to limit long login times.Optionally including the selector flag allows you to select a type to run while running the current command. Use this flag when you wish to select a type without entering another command, or if you wish to work with a type that is different from the one you currently have selected.
Optionally set a starting point for data collection. If you do not specify a starting point, the default path will be /rest/v1.
The path flag can only be specified at the time of login, so if you are already logged into the server, the path flag will not change the path. If you are entering a command that isn’t the login command, but includes your login information, you can still specify the path flag there.- --biospassword=BIOSPASSWORD
Select this flag to input a BIOS password. Include this flag if second-level BIOS authentication is needed for the command to execute.
This option is only used on Gen 9 systems.Types command
iLOrest > login xx.xx.xx.xx -u username -p password Discovering data...Done iLOrest > types Type options: AccountService.v1_3_0 Bios.v1_0_0 CertificateCollection Chassis.v1_6_0 ChassisCollection ComputerSystem.v1_4_0 ComputerSystemCollection EthernetInterface.v1_4_1 EthernetInterfaceCollection EventDestinationCollection EventService.v1_0_8 HostInterface.v1_1_1 HostInterfaceCollection HpeBaseConfigs.v2_0_0 HpeBaseNetworkAdapter.v2_0_0 HpeBaseNetworkAdapterCollection HpeBiosMapping.v2_0_0 HpeCertAuth.v1_1_0 HpeCertificate.v1_0_0 HpeCertificateCollection HpeComponent.v1_0_1 HpeComponentCollection HpeComponentInstallSet.v1_0_3 HpeComponentInstallSetCollection HpeComponentUpdateTaskQueueCollection HpeDirectoryTest.v1_0_0 HpeESKM.v2_0_0 ...Types example commands:
This command will list all the available types that you can select. The full list has been truncated for space.
iLOrest > types --url xx.xx.xx.xx -u username -p password Discovering data...Done Type options: AccountService.v1_3_0 Bios.v1_0_0 CertificateCollection Chassis.v1_6_0 ChassisCollection ComputerSystem.v1_4_0 ComputerSystemCollection EthernetInterface.v1_4_1 EthernetInterfaceCollection EventDestinationCollection EventService.v1_0_8 HostInterface.v1_1_1 HostInterfaceCollection HpeBaseConfigs.v2_0_0 HpeBaseNetworkAdapter.v2_0_0 HpeBaseNetworkAdapterCollection HpeBiosMapping.v2_0_0 HpeCertAuth.v1_1_0 HpeCertificate.v1_0_0 HpeCertificateCollection HpeComponent.v1_0_1 HpeComponentCollection HpeComponentInstallSet.v1_0_3 HpeComponentInstallSetCollection HpeComponentUpdateTaskQueueCollection HpeDirectoryTest.v1_0_0 HpeESKM.v2_0_0 ...This command simultaneously logs in to the server at the provided URL with the provided username and password, and list all the available types that you can select. The full list has been truncated here for space.
iLOrest > types --fulltypes Type options: #AccountService.v1_3_0.AccountService #Bios.v1_0_0.Bios #CertificateCollection.CertificateCollection #Chassis.v1_6_0.Chassis #ChassisCollection.ChassisCollection #ComputerSystem.v1_4_0.ComputerSystem #ComputerSystemCollection.ComputerSystemCollection #EthernetInterface.v1_4_1.EthernetInterface #EthernetInterfaceCollection.EthernetInterfaceCollection #EventDestinationCollection.EventDestinationCollection #EventService.v1_0_8.EventService #HostInterface.v1_1_1.HostInterface #HostInterfaceCollection.HostInterfaceCollection #HpeBaseConfigs.v2_0_0.HpeBaseConfigs #HpeBaseNetworkAdapter.v2_0_0.HpeBaseNetworkAdapter #HpeBaseNetworkAdapterCollection.HpeBaseNetworkAdapterCollection #HpeBiosMapping.v2_0_0.HpeBiosMapping #HpeCertAuth.v1_1_0.HpeCertAuth #HpeCertificate.v1_0_0.HpeCertificate #HpeCertificateCollection.HpeCertificateCollection #HpeComponent.v1_0_1.HpeComponent #HpeComponentCollection.HpeComponentCollection #HpeComponentInstallSet.v1_0_3.HpeComponentInstallSet #HpeComponentInstallSetCollection.HpeComponentInstallSetCollection #HpeComponentUpdateTaskQueueCollection.HpeComponentUpdateTaskQueueCollection #HpeDirectoryTest.v1_0_0.HpeDirectoryTest #HpeESKM.v2_0_0.HpeESKM ...Adding the option will return the full type name instead of the default simplified versions. This is only available on Redfish systems.
Syntax
types [Optional Parameters]
Description
The command displays all selectable types available within the currently logged in server. Types include a name as well as version information. Types represent the schema used for the resource and indicate the version of the schema. Version information is (for example: ). Major versions are not backwards compatible, but everything else is.
See the iLO RESTful API Data Model Reference at https://hewlettpackard.github.io/ilo-rest-api-docs/ for a list and description of all the possible types.Parameters
Including the help flag will display help for the command.
Optionally include this flag if you would prefer to return the full type name instead of the simplified versions.
Login Parameters
The following parameters can be included to login to a server in the same line as the command is run.
If you are not logged in yet, use the provided iLO URL along with the user and password flags to login to the server in the same command.
If you are not logged in yet, use this flag along with the password and URL flags to login to a server in the same command.
- -p Password, --password=PASSWORD
If you are not logged in yet, use this flag along with the user and URL flags to login. Use the provided iLO password corresponding to the username you gave to login.
Use the provided CA bundle or SSL certificate with your login to connect securely to the system in remote mode. This flag has no effect in local mode.
Optionally choose to set the includelogs flag. Doing so will include logs in the data retrieval process.
Use this option to limit long login times.Optionally set a starting point for data collection. If you do not specify a starting point, the default path will be. (see Path Option for more information).
The path flag can only be specified at the time of login, so if you are already logged into the server, the path flag will not change the path. If you are entering a command that isn’t the login command, but includes your login information, you can still specify the path flag there.Inputs
None
Outputs
None
Select command
Adding a period after the selected type will ensure the selection is limited to one type. For example, selecting **Bios** will select both **Bios.v1_0_0** and **HpeBiosMapping.v2_0_0**. Selecting **Bios.** will only select the **Bios.v1_0_0** type. Supplying the type version is not required. The selection **Bios.** and **Bios.v1_0_0** are identical. iLOrest > select ComputerSystem. --url xx.xx.xx.xx -u username -p password Discovering data...Done iLOrest > select Current selection: ComputerSystem.v1_4_0Select example commands:
This command simultaneously logs in to the server at the provided URL (--url) with the provided username (-u) and password (-p), and selects the type.
iLOrest > select Error: No type currently selected. Please use the 'types' command to get a list of types, or pass your type by using the '--selector' flag. iLOrest > select Bios. iLOrest > select Current selection: Bios.v1_0_0Running the select command with no argument will return the current selection.
iLOrest > select Bios iLOrest > select Current selection: HpeBiosMapping.v2_0_0, Bios.v1_0_0 iLOrest > select Bios. iLOrest > select Current selection: Bios.v1_0_0Adding a period after the type selected, , limits the selection, preventing accidentally also selecting anything else starting with . This also removes the need to include the version.
iLOrest > select ComputerSystem. iLOrest > get Oem/Hpe/PowerOnMinutes Oem= Hpe= PowerOnMinutes=814088 iLOrest > select ComputerSystem. --refresh iLOrest > get Oem/Hpe/PowerOnMinutes Oem= Hpe= PowerOnMinutes=814089iLOrest caches data once a type has been selected for the first time. To refresh a type with the most up to date information use the option.
Syntax
select [Type] [Optional Parameters]
Description
Use to choose a specific type to work with. Eligible types for selection are those listed by the types command. Because commands are entered individually in the RESTful Interface Tool, working with specific types requires that you highlight or select the particular type you are working with. Use the command to highlight a type so that you can work with it.
Usage in Other Commands
Select a type from another command by including the (--select, --selector) option flag followed by the type to select. Not all commands have the flag, run help on the command to see available options.
Parameters
Specify the type you want to select. Omitting a type to select will cause select to display the currently selected type.
Including the help flag will display help for the command.
- --biospassword=BIOSPASSWORD
Select this flag to input a BIOS password. Include this flag if second-level BIOS authentication is needed for the command to execute.
This option is only used on Gen 9 systems.Login Parameters
The following parameters can be included to login to a server in the same line as the command is run.
If you are not logged in yet, use the provided iLO URL along with the user and password flags to login to the server in the same command.
If you are not logged in yet, use this flag along with the password and URL flags to login to a server in the same command.
- -p Password, --password=PASSWORD
If you are not logged in yet, use this flag along with the user and URL flags to login. Use the provided iLO password corresponding to the username you gave to login.
Use the provided CA bundle or SSL certificate with your login to connect securely to the system in remote mode. This flag has no effect in local mode.
Optionally choose to set the includelogs flag. Doing so will include logs in the data retrieval process.
Use this option to limit long login times.Optionally set a starting point for data collection. If you do not specify a starting point, the default path will be. (see Path Option for more information).
The path flag can only be specified at the time of login, so if you are already logged into the server, the path flag will not change the path. If you are entering a command that isn’t the login command, but includes your login information, you can still specify the path flag there.Inputs
None
Outputs
None
List command
arguments are not case-sensitive.iLOrest > select Bios. iLOrest > list @odata.context=/redfish/v1/$metadata#Bios.Bios @odata.etag=W/"02E13BA89B606F6F6F02950EB3CA676D" @odata.id=/redfish/v1/systems/1/bios/settings/ @odata.type=#Bios.v1_0_0.Bios AcpiHpet=Enabled AcpiRootBridgePxm=Enabled AcpiSlit=Enabled AdjSecPrefetch=Enabled AdminEmail="" AdminName="" AdminOtherInfo="" AdminPhone="" AdvCrashDumpMode=Disabled AdvancedMemProtection=AdvancedEcc AsrStatus=Enabled AsrTimeoutMinutes=Timeout10 AssetTagProtection=Unlocked AttributeRegistry=BiosAttributeRegistryU32.v1_2_10 AutoPowerOn=RestoreLastState BootMode=Uefi ...List command examples:
With a Type selected, run the command without arguments to list all properties within the selected type, including reserved properties. The full list has been truncated here for space.
iLOrest > select ComputerSystem. iLOrest > list --json { "@odata.context": "/redfish/v1/$metadata#ComputerSystem.ComputerSystem", "@odata.etag": "W/\"9D48B4B7\"", "@odata.id": "/redfish/v1/Systems/1/", "@odata.type": "#ComputerSystem.v1_4_0.ComputerSystem", "Actions": { "#ComputerSystem.Reset": { "ResetType@Redfish.AllowableValues": [ "On", "ForceOff", "ForceRestart", "Nmi", "PushPowerButton" ], "target": "/redfish/v1/Systems/1/Actions/ComputerSystem.Reset/" } }, "AssetTag": "", "Bios": { "@odata.id": "/redfish/v1/systems/1/bios/" }, "BiosVersion": "U32 v2.10 (12/14/2018)", "Boot": { "BootSourceOverrideTarget": "None", "BootSourceOverrideTarget@Redfish.AllowableValues": [ "None", "Cd", "Hdd", ...Including the , option preserves the JSON structure of the type’s information. The full list has been truncated here for space.
iLOrest > list @odata.id Boot/BootSourceOverrideMode AssetTag @odata.id=/redfish/v1/Systems/1/ AssetTag="" Boot= BootSourceOverrideMode=UEFITo return specific properties or sub-properties include them as arguments. If the property you want to return is a sub-property add them in the form .
Syntax
list [Property(s)] [Optional Parameters]
Description
Displays the current values of the properties of a selected type including reserved properties in human-readable and optionally JSON formats. Optionally include arguments to only return the values of those properties.
The list command does display reserved properties for types, while the get command does not.Parameters
Supplying a property or multiple properties will cause list to display the current value for that particular property or properties. Otherwise, if you wish to retrieve all the properties, run without arguments. Use this command only after a type has already been selected. If the value you are looking up is not available, it will return with no contents found for that property entry.
Including the help flag will display help for the command.
- --filter [FILTER_ATTRIBUTE=FILTER_VALUE]
Optionally set a filter value for a filter attribute. This uses the provided filter for the currently selected type. (see Filter Option for more information).
Use this flag to narrow down your results. For example, selecting a common type might return multiple objects that are all of that type. If you want to modify the properties of only one of those objects, use the filter flag to narrow down results based on properties.Optionally include this flag if you wish to change the displayed output to JSON format. Preserving the JSON data structure can make the information easier to parse.
Optionally include the logout flag to log out of the server after this command is completed. You need to be logged in to use this flag.
Login Parameters
The following parameters can be included to login to a server in the same line as the command is run.
If you are not logged in yet, use the provided iLO URL along with the user and password flags to login to the server in the same command.
If you are not logged in yet, use this flag along with the password and URL flags to login to a server in the same command.
- -p Password, --password=PASSWORD
If you are not logged in yet, use this flag along with the user and URL flags to login. Use the provided iLO password corresponding to the username you gave to login.
Use the provided CA bundle or SSL certificate with your login to connect securely to the system in remote mode. This flag has no effect in local mode.
Optionally choose to set the includelogs flag. Doing so will include logs in the data retrieval process.
Use this option to limit long login times.Optionally set a starting point for data collection. If you do not specify a starting point, the default path will be. (see Path Option for more information).
The path flag can only be specified at the time of login, so if you are already logged into the server, the path flag will not change the path. If you are entering a command that isn’t the login command, but includes your login information, you can still specify the path flag there.Inputs
None
Outputs
None
Info Command
iLOrest > select Bios. iLOrest > info Info options: AcpiHpet AcpiRootBridgePxm AcpiSlit AdjSecPrefetch AdminEmail AdminName AdminOtherInfo AdminPhoneInfo command examples:
Omitting a property when using the info command causes info to list all available options, given that you have already selected a type. The full list has been truncated for space.
iLOrest > info PowerSupplies -u username -p password --url xx.xx.xx.xx --select Power. Discovering data...Done NAME PowerSupplies DESCRIPTION Details of the power supplies associated with this system or device TYPE array READ-ONLY True SUB-PROPERTIES Redundancy, Name, SerialNumber, MemberId, @odata.id, PowerCapacityWatts, Model, PartNumber, Status, LastPowerOutputWatts, SparePartNumber, RelatedItem, LineInputVoltageType, Oem, PowerSupplyType, LineInputVoltage, FirmwareVersion, ManufacturerThis command simultaneously logs in to the server at the provided URL (--url) with the provided username (-u) and password (-p), selects the type, and displays the information.
iLOrest > select VirtualMedia. iLOrest > info Image WriteProtected NAME Image DESCRIPTION The valid URI indicating the image that is mounted on this server. A null value indicates that no image exists. TYPE string null READ-ONLY False ************************************************** NAME WriteProtected DESCRIPTION Indicates whether the virtual media is protected against write operations. TYPE boolean null READ-ONLY False POSSIBLE VALUES True or FalseMultiple properties under the VirtualMedia type are specified. By passing multiple properties, it returns the information on all of the properties passed.
iLOrest > select ComputerSystem. iLOrest > info Boot NAME Boot DESCRIPTION The boot information for the current resource. TYPE object READ-ONLY False SUB-PROPERTIES BootSourceOverrideTarget, BootSourceOverrideTarget@Redfish.AllowableValues, BootSourceOverrideEnabled, BootSourceOverrideMode, UefiTargetBootSourceOverride@Redfish.AllowableValues, UefiTargetBootSourceOverride iLOrest > info Boot/BootSourceOverrideTarget NAME BootSourceOverrideTarget DESCRIPTION The current boot source to be used at next boot instead of the normal boot device, if BootSourceOverrideEnabled is true. TYPE string null READ-ONLY FalseAny Sub-Properties shown in an info response can be queried in the same form as set, list, and get: .
Syntax
info [Property(s)] [Optional Parameters]
Description
Displays detailed information about a property within a selected type. Information displayed includes the data type of the value, if the property is read-only or not, a brief description, possible values, and any sub-properties associated with the property.
Parameters
Including the help flag will display help for the command.
Optionally use the latest schema instead of the one requested by the file.
This might cause errors in some data retrieval due to differences in the schema’s organizational structure between versions.Optionally include this flag if you wish to change the displayed output to JSON format. Preserving the JSON data structure makes the information easier to read.
Optionally include the logout flag to log out of the server after this command is completed. You need to be logged in to use this flag.
Login Parameters
The following parameters can be included to login to a server in the same line as the command is run.
If you are not logged in yet, use the provided iLO URL along with the user and password flags to login to the server in the same command.
If you are not logged in yet, use this flag along with the password and URL flags to login to a server in the same command.
- -p Password, --password=PASSWORD
If you are not logged in yet, use this flag along with the user and URL flags to login. Use the provided iLO password corresponding to the username you gave to login.
Use the provided CA bundle or SSL certificate with your login to connect securely to the system in remote mode. This flag has no effect in local mode.
Optionally choose to set the includelogs flag. Doing so will include logs in the data retrieval process.
Use this option to limit long login times.Optionally set a starting point for data collection. If you do not specify a starting point, the default path will be. (see Path Option for more information).
The path flag can only be specified at the time of login, so if you are already logged into the server, the path flag will not change the path. If you are entering a command that isn’t the login command, but includes your login information, you can still specify the path flag there.Inputs
None
Outputs
None
Get command
No reserved properties are shown with the get command. Arguments are not case-sensitive. iLOrest > select Bios. iLOrest > get AcpiHpet=Enabled AcpiRootBridgePxm=Enabled AcpiSlit=Enabled AdjSecPrefetch=Enabled AdminEmail="" AdminName=Michael L AdminOtherInfo="" AdminPhone="" ...Get example commands:
Using get without any property specified shows the properties of the selected type. The full list is truncated for space.
iLOrest > get AdminName AdminName=Jason EUsing get with a specific property lists the current value of that property, given that a type has already been selected.
iLOrest > get BootOrderPolicy --url xx.xx.xx.xx -u username -p password --select Bios. Discovering data...Done BootOrderPolicy=RetryIndefinitelyThis command simultaneously logs in to the server at the provided URL (--url) with the provided username (-u) and password (-p), selects the type, and the command is used to retrieve the property of
iLOrest > select ComputerSystem. iLOrest > get AssetTag --logout AssetTag="" Logging session out.Because the logout flag was included, the user is logged out of the server after the get command is performed.
iLOrest > select ComputerSystem. iLOrest > get MemorySummary MemorySummary= Status= HealthRollup=OK TotalSystemPersistentMemoryGiB=0 TotalSystemMemoryGiB=32 iLOrest > get MemorySummary/Status MemorySummary/TotalSystemMemoryGiB AssetTag AssetTag="" MemorySummary= Status= HealthRollup=OK TotalSystemMemoryGiB=32Any Sub-Properties shown can be queried in the same form as set, list, and info: . You can also specify multiple properties to get simultaneously.
iLOrest > select ComputerSystem. iLOrest > get AssetTag="" BiosVersion=U32 v2.10 (12/14/2018) Boot= BootSourceOverrideTarget=None BootSourceOverrideTarget@Redfish.AllowableValues=None Cd Hdd Usb SDCard Utilities Diags BiosSetup Pxe UefiShell UefiHttp UefiTarget BootSourceOverrideEnabled=Disabled ... iLOrest > get --noreadonly AssetTag="" Boot= BootSourceOverrideTarget=None BootSourceOverrideEnabled=Disabled BootSourceOverrideMode=Legacy UefiTargetBootSourceOverride=None HostName=ahostname IndicatorLED=Unknown Oem= Hpe= EndOfPostDelaySeconds=None PowerOnDelay=Minimum ServerFQDN="" PowerAutoOn=RemainOff PostMode=None ProcessorJitterControl= Mode=Auto PostDiscoveryMode=None PowerRegulatorMode=OSControlYou can use the flag to narrow down your results to only properties that can be changed.
Syntax
get [Property(s)] [Optional Parameters]
Description
Displays the current value of a property of the currently selected type. Use this command only after a type has already been selected. If the value you are looking up is not available, it will return with no contents found for that property entry.
The difference between the get command and the list command is that the list command displays details about the reserved properties, while the get command does not.Parameters
Supplying a property or multiple properties will cause get to display the current value for that particular property or properties. Otherwise, if you wish to retrieve all the properties, run without arguments. This is still assuming you have a type already selected.
Including the help flag will display help for the command.
---selector=SELECTOR
Optionally including the selector flag allows you to select a type to run while running the current command. Use this command to select a type without entering another command, or to work with a type that is different from the one currently selected.
- --filter [FILTER_ATTRIBUTE=FILTER_VALUE]
Optionally set a filter value for a filter attribute. This uses the provided filter for the currently selected type. (see Filter Option for more information).
Use this flag to narrow down your results. For example, selecting a common type might return multiple objects that are all of that type. If you want to modify the properties of only one of those objects, use the filter flag to narrow down results based on properties.Optionally include this flag to change the displayed output to JSON format. Preserving the JSON data structure makes the information easier to read.
Optionally include this flag to display properties that are not read-only. This is useful to see what is configurable with the selected type(s).
Optionally include the logout flag to log out of the server after this command is completed. You need to be logged in to use this flag.
Login Parameters
The following parameters can be included to login to a server in the same line as the command is run.
If you are not logged in yet, use the provided iLO URL along with the user and password flags to login to the server in the same command.
If you are not logged in yet, use this flag along with the password and URL flags to login to a server in the same command.
- -p Password, --password=PASSWORD
If you are not logged in yet, use this flag along with the user and URL flags to login. Use the provided iLO password corresponding to the username you gave to login.
Use the provided CA bundle or SSL certificate with your login to connect securely to the system in remote mode. This flag has no effect in local mode.
Optionally choose to set the includelogs flag. Doing so will include logs in the data retrieval process.
Use this option to limit long login times.Optionally set a starting point for data collection. If you do not specify a starting point, the default path will be. (see Path Option for more information).
The path flag can only be specified at the time of login, so if you are already logged into the server, the path flag will not change the path. If you are entering a command that isn’t the login command, but includes your login information, you can still specify the path flag there.Inputs
None
Outputs
None
Set command
Arguments are not case-sensitive.iLOrest > select Bios. iLOrest > get AdminName ServiceName AdminName="" ServiceName="" iLOrest > set "AdminName=Jason E" ServiceName=ExampleService iLOrest > get AdminName ServiceName AdminName=Jason E ServiceName=ExampleServiceSet example commands:
You can set multiple properties from the same type simultaneously. Add quotes around the property and value to add spaces in the value.
Even though the get command shows **ServiceName** is set to **ExampleService** and **AdminName** set to **Jason E**, the commit command must be performed next for the changes to be updated on the server.
iLOrest > set "AdminName=Jason E" --url xx.xx.xx.xx -u username -p password --select Bios. --commit Discovering data...Done Committing changes... One or more properties were changed and will not take effect until system is reset.This command simultaneously logs in to the server at the provided URL (--url) with the provided username (-u) and password (-p), and then selects the type. The command is used to set the property to , and the commit flag has been added to apply the changes to the server.
iLOrest > select Bios. iLOrest > get AdminName AdminName=Jason E iLOrest > set AdminName=JohnDoe iLOrest > get AdminName AdminName=JohnDoe iLOrest > select Bios. --refresh iLOrest > get AdminName AdminName=Jason ETo revert your changes on a type you can use the refresh flag.
Description
Changes the value of a property in a currently selected type. Multiple properties can be set simultaneously.
The changes set will be reflected on the server only after committing them.Syntax
set [Property=Value] [Path] [Optional Parameters]
The syntax formats used to set properties can be tricky if not done correctly. See the following examples to illustrate how the syntax works.Correct syntax. This sets the to John.
Correct syntax. If the property has a space in it, use quotes around the entire property/value pair. Here the has been set to John Doe.
Correct syntax. Use this syntax, only quotes with no value, to remove the property value.
Correct syntax. This is an alternate syntax that also removes the property and sets it to nothing. Use single quotes with nothing between them.
Correct syntax. This deletes the value.
This is incorrect syntax, and will not be correctly reflected on the server.
Parameters
Supplying a property and a value will stage an update to that property with the supplied value.
Including the help flag will display help for the command.
Optionally including the selector flag allows you to select a type to run while running the current command. Use this flag when you wish to select a type without entering another command, or if you wish to work with a type that is different from the one you currently have selected.
- --filter [FILTER_ATTRIBUTE=FILTER_VALUE]
Optionally set a filter value for a filter attribute. This uses the provided filter for the currently selected type. (see Filter Option for more information).
Use this flag to narrow down your results. For example, selecting a common type might return multiple objects that are all of that type. If you want to modify the properties of only one of those objects, use the filter flag to narrow down results based on properties.Optionally use the latest schema instead of the one requested by the file.
This might cause errors in some data retrieval due to differences in the schema’s organizational structure between versions.Use this flag when you are ready to commit all pending changes. Some changes made in this way will be updated instantly, while others will be reflected the next time the server is started.
- --biospassword=BIOSPASSWORD
Select this flag to input a BIOS password. Include this flag if second-level BIOS authentication is needed for the command to execute.
This option is only used on Gen 9 systems.Use this flag to perform a reboot command function after completion of operations. For help with parameters and descriptions regarding the reboot flag, run .
Override the measures stopping the tool from writing over items that are system unique.
Optionally include the logout flag to log out of the server after this command is completed. You need to be logged in to use this flag.
Login Parameters
The following parameters can be included to login to a server in the same line as the command is run.
If you are not logged in yet, use the provided iLO URL along with the user and password flags to login to the server in the same command.
If you are not logged in yet, use this flag along with the password and URL flags to login to a server in the same command.
- -p Password, --password=PASSWORD
If you are not logged in yet, use this flag along with the user and URL flags to login. Use the provided iLO password corresponding to the username you gave to login.
Use the provided CA bundle or SSL certificate with your login to connect securely to the system in remote mode. This flag has no effect in local mode.
Optionally choose to set the includelogs flag. Doing so will include logs in the data retrieval process.
Use this option to limit long login times.Optionally set a starting point for data collection. If you do not specify a starting point, the default path will be. (see Path Option for more information).
The path flag can only be specified at the time of login, so if you are already logged into the server, the path flag will not change the path. If you are entering a command that isn’t the login command, but includes your login information, you can still specify the path flag there.Inputs
None
Outputs
None
Save command
iLOrest > save --select Bios. --url xx.xx.xx.xx -u username -p password Discovering data...Done Saving configuration... Configuration saved to: ilorest.jsonSave example commands:
Here, the server is logged into, Bios is selected, and the corresponding JSON file is saved to a local directory as the file ilorest.json. The ilorest.json file holds all the information regarding the selected type. Here, the save function was performed on the Bios type, so the file that was saved holds the information about The file holding that information looks like the following.
Example json file:
iLOrest > save --multisave Bios.,ComputerSystem. Discovering data...Done Saving configuration... Configuration saved to: ilorest.jsonUse the multisave option to specify multiple types to save in a single file. This file can be sent to load in order to load multiple types with a single command. All type strings are delimited by a ','.
iLOrest > save --select Bios. --url xx.xx.xx.xx -u username -p password -f BiosInfo.json --logout Discovering data...Done Saving configuration... Configuration saved to: BiosInfo.json Logging session out.This command simultaneously logs in to the server at the provided URL (--url) with the provided username (-u) and password (-p), selects the type, saves the JSON response to a file called in a local directory, and then logs out.
Syntax
save [Optional Parameters]
Description
Saves the JSON information of a selected type to a local file. Use this command along with the command when you want to modify properties of a selected type through file editing. Using this command saves a local copy of your selected type’s JSON information.
Parameters
Including the help flag will display help for the command.
- -f FILENAME, --filename=FILENAME
Use this flag if you wish to use a different filename than the default one. The default filename is .
Optionally including the selector flag allows you to select a type to run while running the current command. Use this flag when you wish to select a type without entering another command, or if you wish to work with a type that is different from the one you currently have selected.
Optionally include this flag to save multiple types of single file. Override the currently selected type.
- --filter [FILTER_ATTRIBUTE=FILTER_VALUE]
Optionally set a filter value for a filter attribute. This uses the provided filter for the currently selected type. (see Filter Option for more information).
Use this flag to narrow down your results. For example, selecting a common type might return multiple objects that are all of that type. If you want to modify the properties of only one of those objects, use the filter flag to narrow down results based on properties.Optionally include this flag if you wish to change the displayed output to JSON format. Preserving the JSON data structure makes the information easier to read.
Optionally include this flag to encrypt a file using the key provided.
Optionally include the logout flag to log out of the server after this command is completed. You need to be logged in to use this flag.
Login Parameters
The following parameters can be included to login to a server in the same line as the command is run.
If you are not logged in yet, use the provided iLO URL along with the user and password flags to login to the server in the same command.
If you are not logged in yet, use this flag along with the password and URL flags to login to a server in the same command.
- -p Password, --password=PASSWORD
If you are not logged in yet, use this flag along with the user and URL flags to login. Use the provided iLO password corresponding to the username you gave to login.
Use the provided CA bundle or SSL certificate with your login to connect securely to the system in remote mode. This flag has no effect in local mode.
Optionally choose to set the includelogs flag. Doing so will include logs in the data retrieval process.
Use this option to limit long login times.Optionally set a starting point for data collection. If you do not specify a starting point, the default path will be. (see Path Option for more information).
The path flag can only be specified at the time of login, so if you are already logged into the server, the path flag will not change the path. If you are entering a command that isn’t the login command, but includes your login information, you can still specify the path flag there.Inputs
None
Outputs
JSON file
Save a selected type to a file in JSON format. You can edit the values in the file, and then use the command to upload the changes to the server.
Load command
iLOrest > load Loading configuration... Committing changes... One or more properties were changed and will not take effect until system is reset.Load example commands:
If no filename is supplied with the (-f, --filename) option, save looks for a file named in the current working directory. Save will automatically select the required type to make changes.
iLOrest > load --url xx.xx.xx.xx -u username -p password -f biosconfig.json Discovering data...Done Loading configuration... Committing changes... One or more properties were changed and will not take effect until system is reset.This command simultaneously logs in to the server at the provided URL (--url) with the provided username (-u) and password (-p) and load a file from the current working directory called .
iLOrest > load -m mpfilename.txt -f biosconfig.json Discovering data...Done Loading configuration for multiple servers... Logging session out. Checking given server information... Create multiple processes to load configuration concurrently to all servers... Loading Configuration for xx.xx.xx.xx : SUCCESS Loading Configuration for xx.xx.xx.xy : SUCCESS All servers have been successfully configured.This is the multi-server configuration setup. You must pass in a multi-server file in the following format.
--url 10.0.0.100 -u username -p password --url 10.0.0.101 -u username -p password --url 10.0.0.102 -u username -p password --url 10.0.0.103 -u username -p passwordAll servers are configured concurrently. Because the filename tag is included, it searches for the file called and loads that information to the servers. If no values have changed, the load process is complete. If any property values have changed, the changes are committed and the user is logged out of the server. Logs of the entire process are then stored in the same location as the iLOrest logs.
Syntax
load [Optional Parameters]
Description
Loads the server configuration from a file. Run this command without parameters to use the configuration found in the file called . Otherwise, you can point this command to use any file you specify. Use this function to change the properties of a type to new values. This command uploads the new values of the type’s properties to the server.
Read-only properties are skipped, and non-read only properties continue to be set.Parameters
Including the help flag will display help for the command.
- -f FILENAME, --filename=FILENAME
Use this flag if you wish to use a different filename than the default one. The default filename is .
Optionally use the latest schema instead of the one requested by the file.
This might cause errors in some data retrieval due to differences in the schema’s organizational structure between versions.- --biospassword=BIOSPASSWORD
Select this flag to input a BIOS password. Include this flag if second-level BIOS authentication is needed for the command to execute.
This option is only used on Gen 9 systems.Override the measures stopping the tool from writing over items that are system unique.
- -m MPFILENAME, --multiprocessing=MPFILENAME
Optionally supply a filename to a multi-processing file to load concurrently on multiple servers.
- -o OUTDIRECTORY, --outputdirectory=OUTDIRECTORY
Use the provided directory to output data for a multiple server configuration.
Optionally include this flag to decrypt a file using the key provided.
Optionally include the logout flag to log out of the server after this command is completed. You need to be logged in to use this flag.
Login Parameters
The following parameters can be included to login to a server in the same line as the command is run.
If you are not logged in yet, use the provided iLO URL along with the user and password flags to login to the server in the same command.
If you are not logged in yet, use this flag along with the password and URL flags to login to a server in the same command.
- -p Password, --password=PASSWORD
If you are not logged in yet, use this flag along with the user and URL flags to login. Use the provided iLO password corresponding to the username you gave to login.
Use the provided CA bundle or SSL certificate with your login to connect securely to the system in remote mode. This flag has no effect in local mode.
Inputs
JSON Object
Input a JSON object to load from a custom configuration file, otherwise the configuration will default to looking for a file called .
Outputs
None
Status command
iLOrest > status Current changes found: Bios.v1_0_0(/redfish/v1/systems/1/bios/settings/) (Currently selected) Attributes/ServiceName=simpleservice ComputerSystem.v1_4_0(/redfish/v1/Systems/1/) AssetTag=newtagStatus example commands:
The status command shows changes to be committed. The status command shows all pending changes, including changes for different types.
iLOrest > status Current changes found: Bios.v1_0_0(/redfish/v1/systems/1/bios/settings/) (Currently selected) Attributes/ServiceName=simpleservice ComputerSystem.v1_4_0(/redfish/v1/Systems/1/) AssetTag=newtag iLOrest > commit Committing changes... One or more properties were changed and will not take effect until system is reset. The operation completed successfully. iLOrest > status No changes foundOnce changes are committed they no longer show in status.
Syntax
status [Optional Parameters]
Description
Displays all pending changes, regardless of which type is currently selected. All the changes that have not been committed yet will be shown.
Parameters
Including the help flag will display help for the command.
Inputs
None
Outputs
None
Commit command
Commit example commands:
Commit all pending changes made by set by running the command.
Last modified: September 22nd, 2020
Getting started
Cloudflare's API exposes the entire Cloudflare infrastructure via a standardized programmatic interface. Using Cloudflare's API, you can do just about anything you can do on cloudflare.com via the customer dashboard.
The Cloudflare API is a RESTful API based on HTTPS requests and JSON responses. If you are registered with Cloudflare, you can obtain your API key from the bottom of the "API Tokens" page, found here: Go to My account.
What is Cloudflare?
Cloudflare makes sites lightning fast, protects them from attacks, ensures they are always online, and makes it simple to add web apps with a single click. Every month, more than 1.8 billion people experience a faster, safer, better Internet thanks to Cloudflare.
Audience for APIs
Cloudflare offers public APIs with three audiences in mind.
- Cloudflare customers
- Cloudflare partners
- Developers
Customers: Individuals and organizations all over the world choose Cloudflare to protect and accelerate their web applications. Most customers manage their settings in the web dashboard, built using these APIs. Virtually anything you can do in the customer dashboard may be done via API. Example: purging the Cloudflare edge cache for a single file when it's updated on the origin server.
Partners: Many organizations make using Cloudflare a seamless option for improving their customers' performance and security. These APIs make that easier to do at scale. Example: a Cloudflare Certified Hosting Partner may use APIs to toggle basic security mode inside a hosting control panel.
Developers: Developers all over the world create useful applications which tie into Cloudflare services. These applications may include plugins and extensions to popular content management systems, apps that are offered in the Cloudflare Apps marketplace, runbooks for specific deployment systems, and many others.
Do's and Don'ts
What can you build with Cloudflare APIs?
Anything that's useful and follows the guidelines presented here.
What should you avoid doing with Cloudflare APIs?
Do not do any of the following:
- Abuse Cloudflare systems or customers
- Misuse Cloudflare trademarks
- Misrepresent Cloudflare services as your own
Abuse: Follow all guidelines, including the rate limits defined below. Your ability to use the Cloudflare APIs may be terminated, temporarily or permanently, if our systems are abused. Similarly, anything in an application which goes against the goal of making Cloudflare more useful to Cloudflare customers or attempts to mistreat customers or their data will be grounds for termination.
Trademarks: Cloudflare has several registered trademarks. Details on how and when you may use Cloudflare trademarks are found at https://www.cloudflare.com/trademark, with links to specifics on logo use and spelling. Please review carefully.
Misrepresentation: Draw a clear line between the benefits you provide in your application and those benefits of the Cloudflare service that you enable via API. The APIs are not intended for "white labeling" or reselling Cloudflare services as your own. Nothing in your service or application should create a false sense of endorsement, sponsorship, or association with Cloudflare. You may sell your own application or service which utilizes the Cloudflare APIs, but may not sell Cloudflare services to customers without a commercial agreement with Cloudflare.
The full Cloudflare Terms of Use are found at https://www.cloudflare.com/terms.
getting-started-endpointsEndpoints
The API is accessed by making HTTPS requests to a specific version endpoint URL, in which GET, POST, PUT, PATCH, and DELETE methods dictate how your interact with the information available. Every endpoint is accessed only via the SSL-enabled HTTPS (port 443) protocol.
Everything (methods, parameters, etc.) is fixed to a version number, and every call must contain one. The latest version is Version 4.
The stable base URL for all Version 4 HTTPS endpoints is:
https://api.cloudflare.com/client/v4/
getting-started-requestsRequests
Requests must be sent over HTTPS with any payload formatted in JSON. Depending on if a request is authenticated with the new API Tokens or the old API Keys, required headers differ and are detailed below.
API Tokens
API Tokens provide a new way to authenticate with the Cloudflare API. They allow for scoped and permissioned access to resources and use the RFC compliant Authorization Bearer Token Header.
Required parameters
API Token cURL (example)
API Keys
All requests must include both X-Auth-Key and X-Auth-Email headers to authenticate. Requests that use X-Auth-User-Service-Key can use that instead of the Auth-Key and Auth-Email headers.
Required parameters
| Name | Format | Description |
|---|---|---|
| API Key | X-Auth-Key | API key generated on the "My Account" page |
| X-Auth-Email | Email address associated with your account | |
| User Service Key | X-Auth-User-Service-Key | A special Cloudflare API key good for a restricted set of endpoints. Always begins with "v1.0-", may vary in length. |
Auth-Email cURL (example)
User-Service cURL (example)
| Name | Type | Description |
|---|---|---|
| page | integer | Which page of results to return |
| per_page | integer | How many results to return per page |
| order | string | Attribute name to order the responses by |
| direction | string | Either asc or desc |
cURL (example)
GET zones/:zone_identifier/dns_recordsResponses
Format
Each response is a JSON object. The data requested is wrapped in the result tag. If you have a response, it will always be within the result field. We also include a success flag, an array of potential errors, and messages in the response. Some responses can have additional pagination info wrapped in the result_info
An error object will contain an integer code field and a message
Date fields will always be in UTC ISO-8601 format, including microseconds.
Success Response (example)
Error Response (example)
| Content-Type | Description |
|---|---|
| application/json | response is a JSON object |
| text/plain | response is a textual item |
| application/x-yaml | response is a YAML object |
| application/octet-stream | response is a raw data (reserved for later use) |
| Code | Status | Description |
|---|---|---|
| 200 | OK | request successful |
| 304 | Not Modified | |
| 400 | Bad Request | request was invalid |
| 401 | Unauthorized | user does not have permission |
| 403 | Forbidden | request not authenticated |
| 429 | Too many requests | client is rate limited |
| 405 | Method Not Allowed | incorrect HTTP method provided |
| 415 | Unsupported Media Type | response is not valid JSON |
How to get a Zone ID, User ID, or Organization ID
Nearly every resource in the v4 API (Users, Zones, Settings, Organizations, etc.) may be uniquely identified by a 32-byte string of hex characters (). These identifiers may be referred to in the documentation as , , or even just . Identifier values are usually captured during resource creation (POST requests) or when fetching entire collections (GET requests) of resources. Typically they appear as an field in the JSON resource.
{ "result": { "id":"2d4d028de3015345da9420df5514dad0", "type":"example" } }You can always find the IDs for API resources by making a GET request to its corresponding collection endpoint. For example, to list all Zone objects, a GET request may be sent to https://api.cloudflare.com/client/v4/zones. All objects listed in the result array will contain an field; this is also known as .
How to Get a Zone ID
curl -X GET "https://api.cloudflare.com/client/v4/zones" \ -H "X-Auth-Email: user@example.com" \ -H "X-Auth-Key: c2547eb745079dac9320b638f5e225cf483cc5cfdda41" \ -H "Content-Type: application/json"User
The currently logged in/authenticated User
useruser-user-detailscURL (example)
Response (example)
Optional parameters
cURL (example)
Response (example)
User API Tokens
Tokens that can be used to access Cloudflare v4 APIs
user-api-tokensuser-api-tokens-list-tokensOptional parameters
cURL (example)
Response (example)
Required parameters
Optional parameters
cURL (example)
Response (example)
cURL (example)
Response (example)
Optional parameters
cURL (example)
Response (example)
cURL (example)
Response (example)
cURL (example)
Response (example)
cURL (example)
Response (example)
Permission Groups
Named groups of permissions used for creating API Tokens access policies
permission-groupspermission-groups-list-permission-groupscURL (example)
Response (example)
User's Account Memberships
A list of memberships of accounts this user can access
user-s-account-membershipsuser-s-account-memberships-list-membershipsOptional parameters
cURL (example)
Response (example)
What’s New in the IP-Upload v1.1.1 serial key or number?
Screen Shot

System Requirements for IP-Upload v1.1.1 serial key or number
- First, download the IP-Upload v1.1.1 serial key or number
-
You can download its setup from given links:

IP-Upload v1.1.1 serial key or number & Key Download

IP-Upload v1.1.1 serial key or number& Software
