
Boris FX Pro 5.0 serial key or number

Boris FX Pro 5.0 serial key or number
BCC FAQ
Here is a list of Frequently asked Questions about our Boris Continuum Complete Product. If your question is not answered below please contact our support team at: +1.617.451.9900 for more information.
How do I activate my Boris Continuum Complete Package?
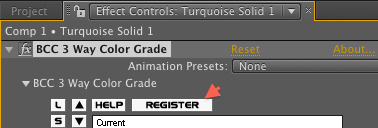
1. After applying a BCC AE filter in After Effect’s timeline, click Register button in the Effect Controls window.
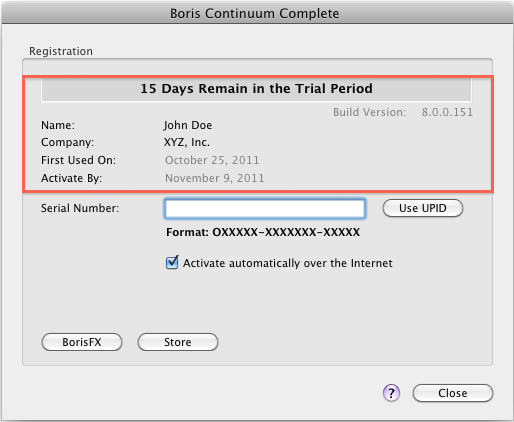
2. This launches Registration Window which displays information about how many Days Remain in the Trial Period (if you installed it as a TNB version using the BC5AE2…number), the Name, the Company Name, First Used date and Activate By date:
3. At this point, you can enter the serial number (starting with “O” that you received upon Purchasing the product) in the Serial Number box:
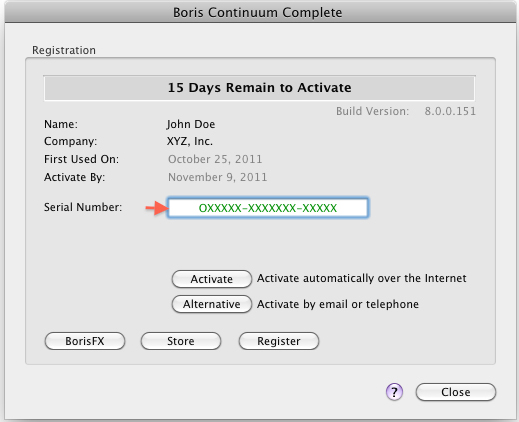
Note: If you used the “O” number when installing the product then it should automatically show up in the Serial Number box.
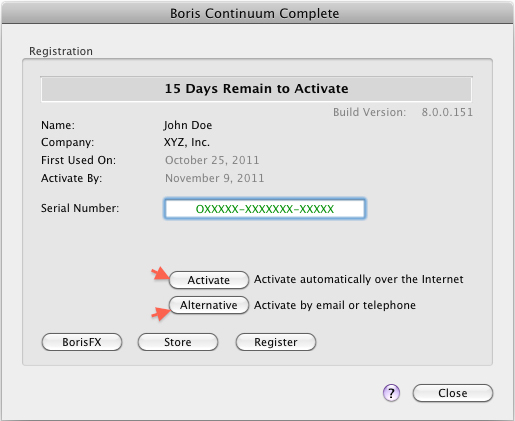
4a. Now, you may click on either the Activate button (to activate the number live over the internet) or the Alternative button (to activate the number by e-mail or telephone):
4b. When you click the Alternative button, a window comes up showing the Unique Product ID number which you must provide to Boris FX to receive the Unlock Code for that system:

Note: You need to click Alternative button if you do not have the “O” number or if you do not want to Activate live over the internet. You must then provide the Unique Product ID number to Boris FX to receive the Unlock Code for that system. Unlock Code is needed to license the product when you choose the Alternative option.
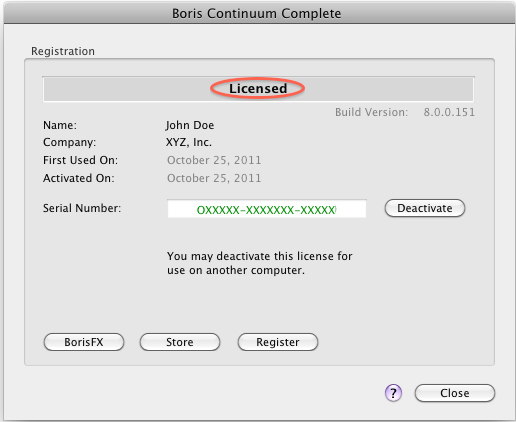
5. Once the number is activated (either via Activate button or via Alternative button), a window comes up stating that the product is now Licensed on that system. You can deactivate the number at any time by clicking on the Deactivate button to be able to install & activate/license the product on another system:
6. The BorisFX button within the Activation Window should launch the system web browser and go to the borisfx.com web site’s home page. Clicking on Store button should launch the system web browser and go to the borisfx.com web site’s products purchase page & clicking on Register button should launch the system web browser and go to the borisfx.com web site’s products registration page . Clicking on the ? button launches this document.
How do I Install My Boris Continuum Complete Package?
There are separate methods of installation for the Windows and Mac versions of Boris Continuum Complete.
Windows:
- Double click .exe file to launch install process.
- Proceed through installed.
- Fill out ALL fields in the customer info portion (won’t license otherwise).
- Choose either custom or complete.
- Custom will allow you to select which packages are installed.
- Complete will install everything.
- Start the installation.
- When asked say yes to seeing the Activation information.
- Place serial number into appropriate field.
- Choose Verify then Activate.
- Upon successful activation close window and say no to seeing the window again.
- Once installer finishes choose Finish.
Mac:
- Double click .dmg to unpack the installer.
- Launch the package file from the new window.
- Proceed through installer.
- Fill out ALL fields in the customer info portion (won’t license otherwise).
- On the activation page fill in your serial number if it isn’t there already
- Click activate.
- Upon successful activation proceed with installation.
BCC AVX Licensing
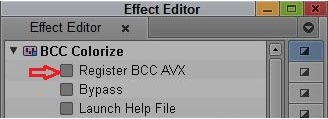
1): After applying a BCC AVX filter in Avid Host’s timeline, click REGISTER BCC AVX button in the Effect Editor window:
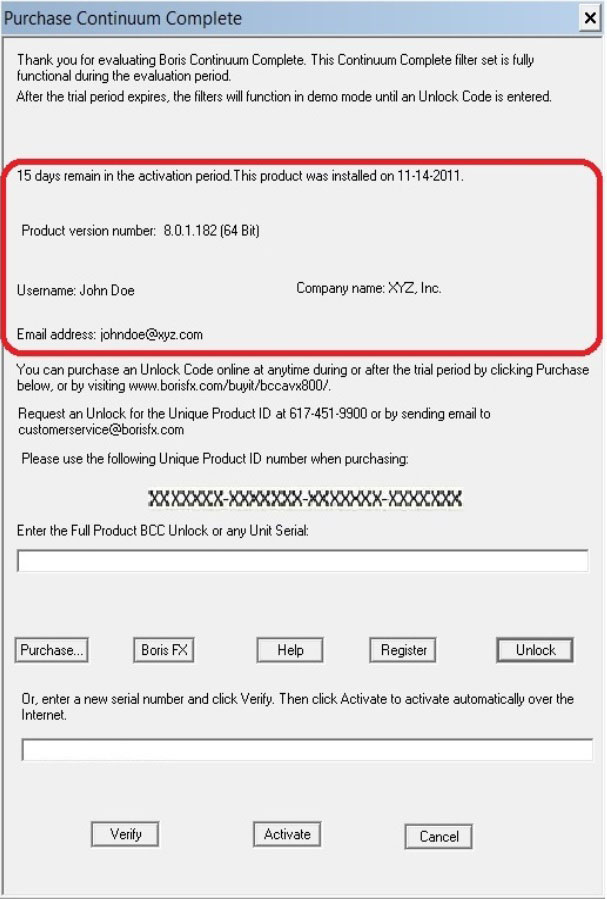
2): This launches Purchase/Registration Window which displays information about how many Days Remain in the Trial Period (if you installed it as a TNB version using the CV27AV…number), the Install Date,the Name, the Company Name, e-mail address you entered etc:
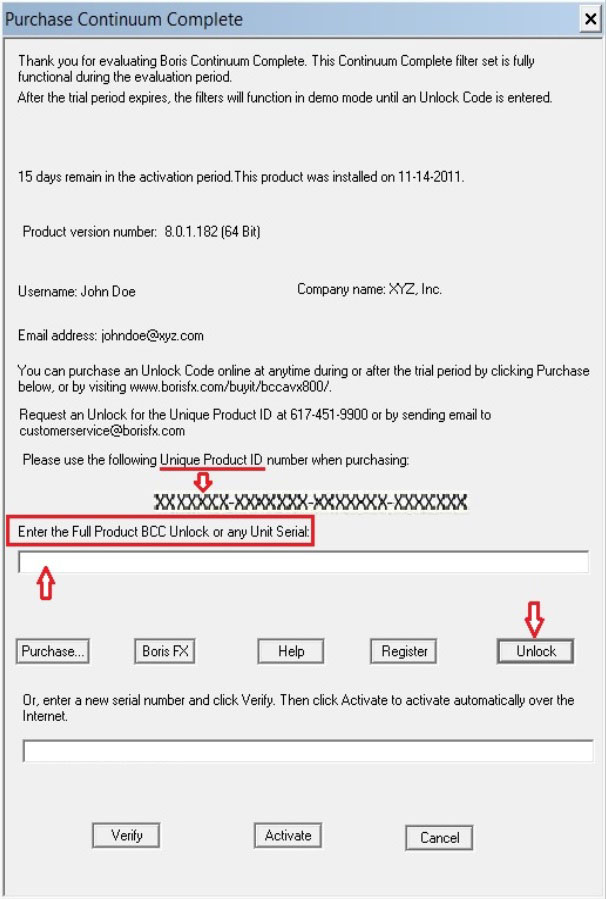
3a): At this point, you can either enter the Unlock Code you received upon purchasing the Full Product. The Unlock Code is based on the Unique Product ID number you provided when purchasing. Or you can enter any Unit’s Serial Number you received if you purchased a BCC Unit/s instead of the Full Product. After you put in the number in the field you need to click Unlock button to License the product:
3b): Or, if you received a serial number (starting with “J”) with the hard copy of the full product you purchased then you need to enter it in the Serial Number field. Now, you need to first click the Verify button for the number’s verification and then the Activate button (to activate the license live over the internet):
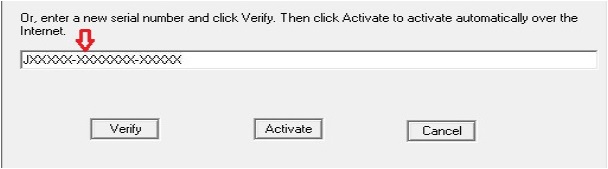
- Note: If you used the “J“number when installing the product then it should automatically show up in the Serial Number box.
4): Upon the serial number’s proper verification following message comes up:

5a): Once the number is successfully verified you need to click on Activate button to license the product:

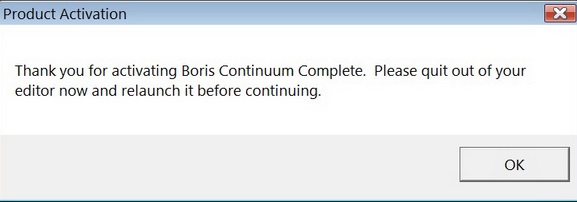
5b): Upon successful activation,a window comes up stating that the license activation was successful and you need to quit and re-launch your Avid Host for proper licensing of the product on that system:
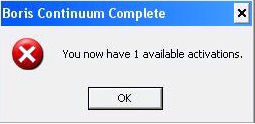
6a): You can deactivate the number at any time by clicking on the Deactivate button to be able to activate the license for the installed product on another system:

6b): Clicking Deactivate button will bring up the following message window indicating that the License can now be Activated on another system:
- Note: If you would like to Activate the same number again on the Deactivated system then you will need to Deactivate it on the system where it is currently Activated and re-launch Avid Host on the to be Activated system and follow the necessary steps to Activate the license.
7): The BorisFX button within the Activation Window should launch the system web browser and go to the borisfx.com web site’s home page. Clicking onPurchase button should launch the system web browser and go to the borisfx.com web site’s products purchase page. Clicking on Register button should launch the system web browser and go to the borisfx.com web site’s products registration page. And clicking on Help button launches this document:

If you have any additional questions please call us at 1.888.772.6747, or if you are calling from outside North America, +1.617.451.9900.
Sapphire Activation Key
How do I set up the Sapphire/GenArts RLM server on my Floating License Server?
Floating License Server Online Activation
To set up the GenArts RLM server on your floating license server:
Step 1: Download and run the GenArts RLM server software on the license server.
Download link: https://borisfx.com/downloads/?&product=RLM%20License%20Server
(Continuum requires RLM v11 or greater.)
Step 2: Open a Web browser and go to: http://SERVERNAME:5054/goforms/activate.
(Replace “SERVERNAME” with the name of the license server.)
Step 3: Click “BEGIN License Activation”.
Step 4: Enter activation.genarts.com in the “ISV activation website” field provided and click “Next”.
Step 5: Enter genarts in the “ISV” field.
Step 6: Copy and paste your Continuum Activation Key license that you received from your license email into the “License activation key” field. Then, click “Next”.
Step 7: Your Ethernet address will auto-populate in the “License Server or Node-lock hostid” field. Accept the auto-populated Ethernet address.
Step 8: Enter the number of licenses that should be locked to this server in the “License count (for floating licenses)” field. Or just enter 0 to assign all licenses to the specified server. Click “Next”.
Step 9: A default license location will auto-populate in the “License File to create or edit” field. Accept the default license location and click “Next”.
Step 10: On the “Activation Request Data” screen, verify all the information you have entered, and click “REQUEST LICENSE”.
Step 11: On the “License Activation” page, click on “(Re)start License Server”.
Step 12: Then, on the “Reread/Restart Servers” page, click on “Reread/Restart”.
This completes the License server set up.
To confirm that the Sapphire/GenArts license server is working, go to http://SERVERNAME:5054 (replace SERVERNAME with the name of the server), and click “Status” on the top left hand corner. Genarts should show up under the ISV Servers and it will say Running: Yes.
Floating License Server Offline Activation
To set up the GenArts RLM server on your offline floating license server:
Step 1: Go to a computer with Internet connection and download the GenArts RLM server software: http://www.genarts.com/support/downloads/rlm-license-server-genarts-products
Step 2: Install the GenArts RLM server software on your offline license server and on your computer with Internet connection. (You will use the online machine to get the license for your offline server.)
(Continuum requires RLM v11 or greater.)
Step 3: On the online computer, open a Web browser and go to: http://SERVERNAME:5054/goforms/activate or http://localhost:5054/goforms/activate
(Replace SERVERNAME with the name of the server.)
Step 4: Click “BEGIN License Activation”.
Step 5: Enter activation.genarts.com in the “ISV activation website” field provided and click “Next”.
Step 6: Enter genartsin the “ISV” field.
Step 7: Copy and paste your Continuum Activation Key license that you received from your license email into the “License activation key” field. Then, click “Next”.
Step 8: The Ethernet address of the machine you are on will auto-populate in the “License Server or Node-lock hostid” field. You will need to overwrite it with the Ethernet address of the offline license server.
To find the Ethernet address of your offline license server:
On Windows: Go to start -> GenArtsRLMServer -> Get RLM HostID
On Mac: In a console type: “/Library/Application Support/GenArts/rlm/Get Hostid.py”
On Linux: In a terminal type: /usr/genarts/rlm/hostid_wrapper.py
(The command will print out the results – Get the first mac address from the first line: “Hostid of this machine:")
Step 9: Enter the number of licenses that should be locked to this server in the “License count (for floating licenses)” field. Or just enter 0 to assign all licenses to the specified server. Click “Next”.
Step 10: A default license location will auto-populate in the “License File to create or edit” field. Replace the default location to a location that you can easily write to and access the file, such as your Desktop or the Downloads folder.
Click “Next”.
Step 11: On the Activation Request Data screen, verify all the information you have entered, and click “REQUEST LICENSE”.
Step 12: On the License Activation page, click on “(Re)start License Server”.
Step 13: On the Reread/Restart Servers page, click on “Reread/Restart”.
Step 14: Transfer the License File on to the offline license server and save the License File to the RLM directory.
For Windows: C:\Program Files (x86)\GenArts\rlm
For Mac: /Library/Application Support/GenArts/rlm/
For Linux: /usr/genarts/rlm/
Step 15: Open the License File and edit the file with your offline server’s Hostname.
Step 16: Open a Web browser on the offline server, go to http://localhost:5054 and click on “(Re)Start License Server”.
This completes the License server set up.
To confirm that the Sapphire/GenArts license server is working, go to http://SERVERNAME:5054 (replace SERVERNAME with the name of the server), and click “Status” on the top left hand corner. Genarts should show up under the ISV Servers and it will say Running: Yes.
Now that everything is installed and activated, you no longer need the RLM server installed on the temporary online computer – you can remove it at this time.
What’s New in the Boris FX Pro 5.0 serial key or number?
Screen Shot

System Requirements for Boris FX Pro 5.0 serial key or number
- First, download the Boris FX Pro 5.0 serial key or number
-
You can download its setup from given links:

Boris FX Pro 5.0 serial key or number & Apps for Laptop & PC Free Download

Boris FX Pro 5.0 serial key or number& Kali Software Crack
