
Toggle Mouse v4.4.7 serial key or number

Toggle Mouse v4.4.7 serial key or number
UI Events
1. Introduction
1.1. Overview
UI Events is designed with two main goals. The first goal is the design of an event system which allows registration of event listeners and describes event flow through a tree structure. Additionally, the specification will provide standard modules of events for user interface control and document mutation notifications, including defined contextual information for each of these event modules.
The second goal of UI Events is to provide a common subset of the current event systems used in existing browsers. This is intended to foster interoperability of existing scripts and content. It is not expected that this goal will be met with full backwards compatibility. However, the specification attempts to achieve this when possible.
1.2. Conformance
This section is normative.
Within this specification, the key words , , , , , , , , , and are to be interpreted as described in [RFC2119].
This specification is to be understood in the context of the DOM Level 3 Core specification [DOM-Level-3-Core] and the general considerations for DOM implementations apply. For example, handling of namespace URIs is discussed in XML Namespaces. For additional information about conformance, please see the DOM Level 3 Core specification [DOM-Level-3-Core]. A user agent is not required to conform to the entirety of another specification in order to conform to this specification, but it MUST conform to the specific parts of any other specification which are called out in this specification (e.g., a conforming UI Events user agent MUST support the data type as defined in [[Web IDL]], but need not support every method or data type defined in [[Web IDL]] in order to conform to UI Events).
This specification defines several classes of conformance for different user agents, specifications, and content authors:
1.2.1. Web browsers and other dynamic or interactive user agents
A dynamic or interactive user agent, referred to here as a (be it a Web browser, AT (Accessibility Technology) application, or other similar program), conforms to UI Events if it supports:
the Core module defined in [DOM-Level-3-Core]
the §3.1 Event dispatch and DOM event flow mechanism
all the interfaces and events with their associated methods, attributes, and semantics defined in this specification with the exception of those marked as deprecated (a conforming user agent MAY implement the deprecated interfaces, events, or APIs for backwards compatibility, but is not required to do so in order to be conforming)
the complete set of and values defined in [UIEvents-Key] and [UIEvents-Code] (subject to platform availability), and
all other normative requirements defined in this specification.
A conforming browser MUST dispatch events appropriate to the given when the conditions defined for that event type have been met.
A browser conforms specifically to UI Events if it implements the interfaces and related event types specified in §4 Event Types.
A conforming browser MUST support scripting, declarative interactivity, or some other means of detecting and dispatching events in the manner described by this specification, and MUST support the APIs specified for that event type.
In addition to meeting all other conformance criteria, a conforming browser MAY implement features of this specification marked as deprecated, for backwards compatibility with existing content, but such implementation is discouraged.
A conforming browser MAY also support features not found in this specification, but which use the §3.1 Event dispatch and DOM event flow mechanism, interfaces, events, or other features defined in this specification, and MAY implement additional interfaces and event types appropriate to that implementation. Such features can be later standardized in future specifications.
A browser which does not conform to all required portions of this specification MUST NOT claim conformance to UI Events. Such an implementation which does conform to portions of this specification MAY claim conformance to those specific portions.
A conforming browser MUST also be a conforming implementation of the IDL fragments in this specification, as described in the Web IDL specification [WebIDL].
1.2.2. Authoring tools
A content authoring tool conforms to UI Events if it produces content which uses the event types and §3.1 Event dispatch and DOM event flow model, consistent in a manner as defined in this specification.
A content authoring tool MUST NOT claim conformance to UI Events for content it produces which uses features of this specification marked as deprecated in this specification.
A conforming content authoring tool SHOULD provide to the content author a means to use all event types and interfaces appropriate to all host languages in the content document being produced.
1.2.3. Content authors and content
A content author creates conforming UI Events content if that content uses the event types and §3.1 Event dispatch and DOM event flow model, consistent in a manner as defined in this specification.
A content author SHOULD NOT use features of this specification marked as deprecated, but SHOULD rely instead upon replacement mechanisms defined in this specification and elsewhere.
Conforming content MUST use the semantics of the interfaces and event types as described in this specification.
Content authors are advised to follow best practices as described in accessibility and internationalization guideline specifications.
1.2.4. Specifications and host languages
A specification or host language conforms to UI Events if it references and uses the §3.1 Event dispatch and DOM event flow mechanism, interfaces, events, or other features defined in [DOM], and does not extend these features in incompatible ways.
A specification or host language conforms specifically to UI Events if it references and uses the interfaces and related event types specified in §4 Event Types. A conforming specification MAY define additional interfaces and event types appropriate to that specification, or MAY extend the UI Events interfaces and event types in a manner that does not contradict or conflict with the definitions of those interfaces and event types in this specification.
Specifications or host languages which reference UI Events SHOULD NOT use or recommend features of this specification marked as deprecated, but SHOULD use or recommend the indicated replacement for that the feature (if available).
2. Stylistic Conventions
This specification follows the Proposed W3C Specification Conventions, with the following supplemental additions:
The key cap printed on a key is shown as , or . This is used to refer to a key from the user’s perspective without regard for the and values in the generated .
Glyphs representing character are shown as: .
Unicode character encodings are shown as: .
Names of key values generated by a key press (i.e., the value of .) are shown as: , , or .
Names of key codes associated with the physical keys (i.e., the value of .) are shown as: , or .
In addition, certain terms are used in this specification with particular meanings. The term applies to a browser, content authoring tool, or other user agent that implements this specification, while a content author is a person who writes script or code that takes advantage of the interfaces, methods, attributes, events, and other features described in this specification in order to make Web applications, and a user is the person who uses those Web applications in an implementation.
And finally:
This is a note.
This is an open issue.
This is a warning.
interface Example { // This is an IDL definition. };3. DOM Event Architecture
This section is non-normative. Refer to [DOM] for a normative description of the DOM event architecture
3.1. Event dispatch and DOM event flow
This section gives a brief overview of the event dispatch mechanism and describes how events propagate through the DOM tree. Applications can dispatch event objects using the method, and the event object will propagate through the DOM tree as determined by the DOM event flow.
Event objects are dispatched to an event target. But before dispatch can begin, the event object’s propagation path must first be determined.
The propagation path is an ordered list of current event targets through which the event passes. This propagation path reflects the hierarchical tree structure of the document. The last item in the list is the event target, and the preceding items in the list are referred to as the target’s ancestors, with the immediately preceding item as the target’s parent.
Once the propagation path has been determined, the event object passes through one or more event phases. There are three event phases: capture phase, target phase and bubble phase. Event objects complete these phases as described below. A phase will be skipped if it is not supported, or if the event object’s propagation has been stopped. For example, if the attribute is set to false, the bubble phase will be skipped, and if has been called prior to the dispatch, all phases will be skipped.
The capture phase: The event object propagates through the target’s ancestors from the Window to the target’s parent. This phase is also known as the capturing phase.
The target phase: The event object arrives at the event object’s event target. This phase is also known as the at-target phase. If the event type indicates that the event doesn’t bubble, then the event object will halt after completion of this phase.
The bubble phase: The event object propagates through the target’s ancestors in reverse order, starting with the target’s parent and ending with the Window. This phase is also known as the bubbling phase.
3.2. Default actions and cancelable events
Events are typically dispatched by the implementation as a result of a user action, in response to the completion of a task, or to signal progress during asynchronous activity (such as a network request). Some events can be used to control the behavior that the implementation may take next (or undo an action that the implementation already took). Events in this category are said to be cancelable and the behavior they cancel is called their default action. Cancelable event objects can be associated with one or more 'default actions'. To cancel an event, call the method.
A event is dispatched immediately after the user presses down a button on a pointing device (typically a mouse). One possible default action taken by the implementation is to set up a state machine that allows the user to drag images or select text. The default action depends on what happens next — for example, if the user’s pointing device is over text, a text selection might begin. If the user’s pointing device is over an image, then an image-drag action could begin. Preventing the default action of a event prevents these actions from occurring.
Default actions are usually performed after the event dispatch has been completed, but in exceptional cases they may also be performed immediately before the event is dispatched.
The default action associated with the event on elements toggles the IDL attribute value of that element. If the event’s default action is cancelled, then the value is restored to its former state.
When an event is canceled, then the conditional default actions associated with the event is skipped (or as mentioned above, if the default actions are carried out before the dispatch, their effect is undone). Whether an event object is cancelable is indicated by the attribute. Calling stops all related default actions of an event object. The attribute indicates whether an event has already been canceled (e.g., by a prior event listener). If the DOM application itself initiated the dispatch, then the return value of the method indicates whether the event object was cancelled.
Many implementations additionally interpret an event listener’s return value, such as the value , to mean that the default action of cancelable events will be cancelled (though handlers are cancelled by returning ).
3.3. Synchronous and asynchronous events
Events may be dispatched either synchronously or asynchronously.
Events which are synchronous () are treated as if they are in a virtual queue in a first-in-first-out model, ordered by sequence of temporal occurrence with respect to other events, to changes in the DOM, and to user interaction. Each event in this virtual queue is delayed until the previous event has completed its propagation behavior, or been canceled. Some sync events are driven by a specific device or process, such as mouse button events. These events are governed by the event order algorithms defined for that set of events, and user agents will dispatch these events in the defined order.
Events which are asynchronous () may be dispatched as the results of the action are completed, with no relation to other events, to other changes in the DOM, nor to user interaction.
During loading of a document, an inline script element is parsed and executed. The event is queued to be fired asynchronously at the script element. However, because it is an async event, its order with relation to other synchronous events fired during document load (such as the event from [HTML5]) is not guaranteed.
3.4. Trusted events
Events that are generated by the user agent, either as a result of user interaction, or as a direct result of changes to the DOM, are trusted by the user agent with privileges that are not afforded to events generated by script through the method, modified using the method, or dispatched via the method. The attribute of trusted events has a value of , while untrusted events have a attribute value of .
Most untrusted events will not trigger default actions, with the exception of the event. This event always triggers the default action, even if the attribute is (this behavior is retained for backward-compatibility). All other untrusted events behave as if the method had been called on that event.
3.5. Activation triggers and behavior
Certain event targets (such as a link or button element) may have associated activation behavior (such as following a link) that implementations perform in response to an activation trigger (such as clicking a link).
Both HTML and SVG have an element which indicates a link. Relevant activation triggers for an element are a event on the text or image content of the element, or a event with a attribute value of key when the element has focus. The activation behavior for an element is normally to change the content of the window to the content of the new document, in the case of external links, or to reposition the current document relative to the new anchor, in the case of internal links.
An activation trigger is a user action or an event which indicates to the implementation that an activation behavior should be initiated. User-initiated activation triggers include clicking a mouse button on an activatable element, pressing the key when an activatable element has focus, or pressing a key that is somehow linked to an activatable element (a or ) even when that element does not have focus. Event-based activation triggers may include timer-based events that activate an element at a certain clock time or after a certain time period has elapsed, progress events after a certain action has been completed, or many other condition-based or state-based events.
3.6. Constructing Mouse and Keyboard Events
Generally, when a constructor of an interface, or of an interface inherited from the interface, is invoked, the steps described in [DOM] should be followed. However the and interfaces provide additional dictionary members for initializing the internal state of the object’s key modifiers: specifically, the internal state queried for using the and methods. This section supplements the DOM4 steps for intializing a new object with these optional modifier states.
For the purposes of constructing a , , or object derived from these objects using the algorithm below, all , , and derived objects have which can be set and retrieved using the key modifier names described in the Modifier Keys table in [UIEvents-Key].
The following steps supplement the algorithm defined for constructing events in DOM4:
4. Event Types
The DOM Event Model allows a DOM implementation to support multiple modules of events. The model has been designed to allow addition of new event modules in the future. This document does not attempt to define all possible events. For purposes of interoperability, the DOM defines a module of user interface events including lower level device dependent events and a module of document mutation events.
4.1. User Interface Events
The User Interface event module contains basic event types associated with user interfaces and document manipulation.
4.1.1. Interface UIEvent
Introduced in DOM Level 2
The interface provides specific contextual information associated with User Interface events.
To create an instance of the interface, use the UIEvent constructor, passing an optional dictionary.
For newly defined events, you don’t have to inherit interface just because they are related to user interface. Inherit only when members of make sense to those events.
4.1.1.1. UIEvent
[(DOMString, optionalUIEventInit), Exposed=Window] interface : Event { readonlyattributeWindow? ; readonlyattributelong; };- The attribute identifies the from which the event was generated.
The un-initialized value of this attribute MUST be .
- Specifies some detail information about the , depending on the type of event.
The un-initialized value of this attribute MUST be .
4.1.1.2. UIEventInit
dictionary : EventInit { Window? = null; long = 0; };- Should be initialized to the Window object of the global environment in which this event will be dispatched. If this event will be dispatched to an element, the view property should be set to the Window object containing the element’s .
- This value is initialized to a number that is application-specific.
4.1.2. UI Event Types
The User Interface event types are listed below. Some of these events use the interface if generated from a user interface, but the interface otherwise, as detailed in each event.
4.1.2.1.
| Type | |
|---|---|
| Interface | if generated from a user interface, otherwise. |
| Sync / Async | Async |
| Bubbles | No |
| Trusted Targets | , , |
| Cancelable | No |
| Default action | None |
| Context (trusted events) |
A user agent MUST dispatch this event when the DOM implementation finishes loading the resource (such as the document) and any dependent resources (such as images, style sheets, or scripts). Dependent resources that fail to load MUST NOT prevent this event from firing if the resource that loaded them is still accessible via the DOM. If this event type is dispatched, implementations are REQUIRED to dispatch this event at least on the node.
For legacy reasons, events for resources inside the document (e.g., images) do not include the Window in the propagation path in HTML implementations. See [HTML5] for more information.
4.1.2.2.
| Type | |
|---|---|
| Interface | if generated from a user interface, otherwise. |
| Sync / Async | Sync |
| Bubbles | No |
| Trusted Targets | , , |
| Cancelable | No |
| Default action | None |
| Context (trusted events) |
A user agent MUST dispatch this event when the DOM Implementation removes from the environment the resource (such as the document) or any dependent resources (such as images, style sheets, scripts). The document MUST be unloaded after the dispatch of this event type. If this event type is dispatched, implementations are REQUIRED to dispatch this event at least on the node.
4.1.2.3.
| Type | |
|---|---|
| Interface | if generated from a user interface, otherwise. |
| Sync / Async | Sync |
| Bubbles | No |
| Trusted Targets | , |
| Cancelable | No |
| Default action | None |
| Context (trusted events) |
A user agent MUST dispatch this event when the loading of a resource has been aborted, such as by a user canceling the load while it is still in progress.
4.1.2.4.
| Type | |
|---|---|
| Interface | if generated from a user interface, otherwise. |
| Sync / Async | Async |
| Bubbles | No |
| Trusted Targets | , |
| Cancelable | No |
| Default action | None |
| Context (trusted events) |
A user agent MUST dispatch this event when a resource failed to load, or has been loaded but cannot be interpreted according to its semantics, such as an invalid image, a script execution error, or non-well-formed XML.
4.1.2.5.
| Type | |
|---|---|
| Interface | if generated from a user interface, otherwise. |
| Sync / Async | Sync |
| Bubbles | Yes |
| Trusted Targets | |
| Cancelable | No |
| Default action | None |
| Context (trusted events) |
A user agent MUST dispatch this event when a user selects some text. This event is dispatched after the selection has occurred.
This specification does not provide contextual information to access the selected text. Where applicable, a host language SHOULD define rules for how a user MAY select content (with consideration for international language conventions), at what point the event is dispatched, and how a content author MAY access the user-selected content.
In order to access to user-selected content, content authors will use native capabilities of the host languages, such as the method of the HTML Editing APIs [Editing].
The event might not be available for all elements in all languages. For example, in [HTML5], events can be dispatched only on form and elements. Implementations can dispatch events in any context deemed appropriate, including text selections outside of form controls, or image or markup selections such as in SVG.
4.2. Focus Events
This interface and its associated event types and §4.2.2 Focus Event Order were designed in accordance to the concepts and guidelines defined in User Agent Accessibility Guidelines 2.0[UAAG20], with particular attention on the focus mechanism and the terms defined in the glossary entry for focus.
4.2.1. Interface FocusEvent
Introduced in this specification
The interface provides specific contextual information associated with Focus events.
To create an instance of the interface, use the FocusEvent constructor, passing an optional dictionary.
4.2.1.1. FocusEvent
[(DOMString, optionalFocusEventInit), Exposed=Window] interface : UIEvent { readonlyattributeEventTarget? ; };- Used to identify a secondary related to a Focus event, depending on the type of event.
For security reasons with nested browsing contexts, when tabbing into or out of a nested context, the relevant SHOULD be .
The un-initialized value of this attribute MUST be .
4.2.1.2. FocusEventInit
dictionary : UIEventInit { EventTarget? = null; };- The should be initialized to the element losing focus (in the case of a or event) or the element gaining focus (in the case of a or event).
4.2.2. Focus Event Order
The focus events defined in this specification occur in a set order relative to one another. The following is the typical sequence of events when a focus is shifted between elements (this order assumes that no element is initially focused):
| Event Type | Notes | |
|---|---|---|
| User shifts focus | ||
| 1 | Sent before first target element receives focus | |
| 2 | Sent after first target element receives focus | |
| User shifts focus | ||
| 3 | Sent before first target element loses focus | |
| 4 | Sent before second target element receives focus | |
| 5 | Sent after first target element loses focus | |
| 6 | Sent after second target element receives focus |
This specification does not define the behavior of focus events when interacting with methods such as or . See the relevant specifications where those methods are defined for such behavior.
4.2.3. Document Focus and Focus Context
This event module includes event types for notification of changes in document focus. There are three distinct focus contexts that are relevant to this discussion:
The operating system focus context which MAY be on one of many different applications currently running on the computer. One of these applications with focus can be a browser.
When the browser has focus, the user can switch (such as with the tab key) the application focus context among the different browser user interface fields (e.g., the Web site location bar, a search field, etc.). One of these user interface fields can be the document being shown in a tab.
When the document itself has focus, the document focus context can be set to any of the focusable elements in the document.
Computer keyboard


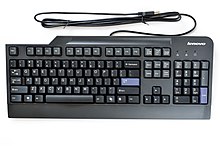
A computer keyboard is a typewriter-style device[1] which uses an arrangement of buttons or keys to act as mechanical levers or electronic switches. Replacing early punched cards and paper tape technology, interaction via teleprinter-style keyboards have been the main input method for computers since the 1970s, supplemented by the computer mouse since the 1980s.
Keyboard keys (buttons) typically have a set of characters engraved or printed on them, and each press of a key typically corresponds to a single written symbol. However, producing some symbols may require pressing and holding several keys simultaneously or in sequence.[2] While most keyboard keys produce letters, numbers or symbols (characters), other keys or simultaneous key presses can prompt the computer to execute system commands, such as such as the Control-Alt-Delete combination used with Microsoft Windows.[3][4]. In a modern computer, the interpretation of key presses is generally left to the software: the information sent to the computer, the scan code, tells it only which key (or keys) on which row and column, was pressed or released.[5]
In normal usage, the keyboard is used as a text entry interface for typing text, numbers, and symbols into application software such as a word processor, web browser or social media app.
History[edit]
While typewriters are the definitive ancestor of all key-based text entry devices, the computer keyboard as a device for electromechanical data entry and communication derives largely from the utility of two devices: teleprinters (or teletypes) and keypunches. It was through such devices that modern computer keyboards inherited their layouts.
As early as the 1870s, teleprinter-like devices were used to simultaneously type and transmit stock market text data from the keyboard across telegraph lines to stock ticker machines to be immediately copied and displayed onto ticker tape.[6] The teleprinter, in its more contemporary form, was developed from 1907 to 1910 by American mechanical engineer Charles Krum and his son Howard, with early contributions by electrical engineer Frank Pearne. Earlier models were developed separately by individuals such as Royal Earl House and Frederick G. Creed.
Earlier, Herman Hollerith developed the first keypunch devices, which soon evolved to include keys for text and number entry akin to normal typewriters by the 1930s.[7]
The keyboard on the teleprinter played a strong role in point-to-point and point-to-multipoint communication for most of the 20th century, while the keyboard on the keypunch device played a strong role in data entry and storage for just as long. The development of the earliest computers incorporated electric typewriter keyboards: the development of the ENIAC computer incorporated a keypunch device as both the input and paper-based output device, while the BINAC computer also made use of an electromechanically controlled typewriter for both data entry onto magnetic tape (instead of paper) and data output.[8]
The keyboard remained the primary, most integrated computer peripheral well into the era of personal computing until the introduction of the mouse as a consumer device in 1984. By this time, text-only user interfaces with sparse graphics gave way to comparatively graphics-rich icons on screen.[9] However, keyboards remain central to human-computer interaction to the present, even as mobile personal computing devices such as smartphones and tablets adapt the keyboard as an optional virtual, touchscreen-based means of data entry.
Types and standards[edit]
Different types of keyboards are available and each is designed with a focus on specific features that suit particular needs.[10] Today, most full-size keyboards use one of three different mechanical layouts, usually referred to as simply ISO (ISO/IEC 9995-2), ANSI (ANSI-INCITS 154-1988), and JIS (JIS X 6002-1980), referring roughly to the organizations issuing the relevant worldwide, United States, and Japanese standards, respectively. (In fact, the mechanical layouts referred such as "ISO" and "ANSI" comply to the primary recommendations in the named standards, while each of these standards in fact also allows the other way.) ANSI standard alphanumeric keyboards have keys that are on three-quarter inch centers (0.75 inches (19 mm)), and have a key travel of at least 0.15 inches (3.8 mm).[citation needed]
Modern keyboard models contain a set number of total keys according to their given standard, described as 101, 104, 105, etc. and sold as "Full-size" keyboards.[11] Modern keyboards matching US conventions typically have 104 keys while the 105 key layout is the norm in the rest of the world. This number is not always followed, and individual keys or whole sections are commonly skipped for the sake of compactness or user preference. The most common choice is to not include the numpad, which can usually be fully replaced by the alphanumeric section. Laptops and wireless peripherals often lack duplicate keys and ones seldom used. Function- and arrow keys are nearly always present.
Another factor determining the size of a keyboard is the size and spacing of the keys. The reduction is limited by the practical consideration that the keys must be large enough to be easily pressed by fingers. Alternatively, a tool is used for pressing small keys.
Desktop or full-size[edit]
Desktop computer keyboards include alphabetic characters and numerals, typographical symbols and punctuation marks, one or more currency symbols and other special characters, diacritics and a variety of function keys. The repertoire of glyphs engraved on the keys of a keyboard accords with national conventions and language needs. Computer keyboards are similar to electric-typewriter keyboards but contain additional keys, such as the command key or Windows keys.
Laptop-size[edit]
Keyboards on laptops and notebook computers usually have a shorter travel distance for the keystroke, shorter over travel distance, and a reduced set of keys. They may not have a numeric keypad, and the function keys may be placed in locations that differ from their placement on a standard, full-sized keyboard. The switch mechanism for a laptop keyboard is more likely to be a scissor switch than a rubber dome; this is opposite the trend for full-size keyboards.
Flexible keyboards[edit]
Flexible keyboards are a junction between normal type and laptop type keyboards: normal from the full arrangement of keys, and laptop from the short key distance. Additionally, the flexibility allows the user to fold/roll the keyboard for better storage and transfer. However, for typing the keyboard must be resting on a hard surface. The vast majority[12] of flexible keyboards in the market are made from silicone; this material makes them water- and dust-proof. This is useful in hospitals,[13] where keyboards are subjected to frequent washing, and other dirty or must-be-clean environments.
Handheld[edit]

Handheld ergonomic keyboards[14][15] are designed to be held like a game controller, and can be used as such, instead of laid out flat on top of a table surface.
Typically handheld keyboards hold all the alphanumeric keys and symbols that a standard keyboard would have, yet only be accessed by pressing two sets of keys at once; one acting as a function key similar to a 'Shift' key that would allow for capital letters on a standard keyboard.[16] Handheld keyboards allow the user the ability to move around a room or to lean back on a chair while also being able to type in front or away from the computer.[17] Some variations of handheld ergonomic keyboards also include a trackball mouse that allow mouse movement and typing included in one handheld device.[18]
Thumb-sized[edit]
Smaller external keyboards have been introduced for devices without a built-in keyboard, such as PDAs, and smartphones. Small keyboards are also useful where there is a limited workspace.[19]
A thumb keyboard (thumb board) is used in some personal digital assistants such as the Palm Treo and BlackBerry and some Ultra-Mobile PCs such as the OQO.
Numeric keyboards contain only numbers, mathematical symbols for addition, subtraction, multiplication, and division, a decimal point, and several function keys. They are often used to facilitate data entry with smaller keyboards that do not have a numeric keypad, commonly those of laptop computers.[20] These keys are collectively known as a numeric pad, numeric keys, or a numeric keypad, and it can consist of the following types of keys: Arithmetic operators, numbers, arrow keys, Navigation keys, Num Lock and Enter key.
Multifunctional[edit]

Multifunctional keyboards provide additional function beyond the standard keyboard. Many are programmable, configurable computer keyboards and some control multiple PCs, workstations and other information sources, usually in multi-screen work environments. Users have additional key functions as well as the standard functions and can typically use a single keyboard and mouse to access multiple sources.

Multifunctional keyboards may feature customised keypads, fully programmable function or soft keys for macros/pre-sets, biometric or smart card readers, trackballs, etc. New generation multifunctional keyboards feature a touchscreen display to stream video, control audio visual media and alarms, execute application inputs, configure individual desktop environments, etc. Multifunctional keyboards may also permit users to share access to PCs and other information sources. Multiple interfaces (serial, USB, audio, Ethernet, etc.) are used to integrate external devices. Some multifunctional keyboards are also used to directly and intuitively control video walls.
Common environments for multifunctional keyboards are complex, high-performance workplaces for financial traders and control room operators (emergency services, security, air traffic management; industry, utilities management, etc.).
Non-standard layout and special-use types[edit]
Chorded[edit]
While other keyboards generally associate one action with each key, chorded keyboards associate actions with combinations of key presses. Since there are many combinations available, chorded keyboards can effectively produce more actions on a board with fewer keys. Court reporters' stenotype machines use chorded keyboards to enable them to enter text much faster by typing a syllable with each stroke instead of one letter at a time. The fastest typists (as of 2007) use a stenograph, a kind of chorded keyboard used by most court reporters and closed-caption reporters. Some chorded keyboards are also made for use in situations where fewer keys are preferable, such as on devices that can be used with only one hand, and on small mobile devices that don't have room for larger keyboards. Chorded keyboards are less desirable in many cases because it usually takes practice and memorization of the combinations to become proficient.
Software[edit]
Software keyboards or on-screen keyboards often take the form of computer programs that display an image of a keyboard on the screen. Another input device such as a mouse or a touchscreen can be used to operate each virtual key to enter text. Software keyboards have become very popular in touchscreen enabled cell phones, due to the additional cost and space requirements of other types of hardware keyboards. Microsoft Windows, Mac OS X, and some varieties of Linux include on-screen keyboards that can be controlled with the mouse. In software keyboards, the mouse has to be maneuvered onto the on-screen letters given by the software. On the click of a letter, the software writes the respective letter on the respective spot.
Projection[edit]
Projection keyboards project an image of keys, usually with a laser, onto a flat surface. The device then uses a camera or infrared sensor to "watch" where the user's fingers move, and will count a key as being pressed when it "sees" the user's finger touch the projected image. Projection keyboards can simulate a full size keyboard from a very small projector. Because the "keys" are simply projected images, they cannot be felt when pressed. Users of projected keyboards often experience increased discomfort in their fingertips because of the lack of "give" when typing. A flat, non-reflective surface is also required for the keys to be projected. Most projection keyboards are made for use with PDAs and smartphones due to their small form factor.
Optical keyboard technology[edit]
Also known as photo-optical keyboard, light responsive keyboard, photo-electric keyboard and optical key actuation detection technology.
An optical keyboard technology[21] utilizes LEDs and photo sensors to optically detect actuated keys. Most commonly the emitters and sensors are located in the perimeter, mounted on a small PCB. The light is directed from side to side of the keyboard interior and it can only be blocked by the actuated keys. Most optical keyboards[22] require at least 2 beams (most commonly vertical beam and horizontal beam) to determine the actuated key. Some optical keyboards use a special key structure that blocks the light in a certain pattern, allowing only one beam per row of keys (most commonly horizontal beam).
Key types[edit]
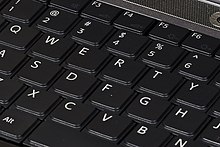
Alphanumeric[edit]
Alphabetical, numeric, and punctuation keys are used in the same fashion as a typewriter keyboard to enter their respective symbol into a word processing program, text editor, data spreadsheet, or other program. Many of these keys will produce different symbols when modifier keys or shift keys are pressed. The alphabetic characters become uppercase when the shift key or Caps Lock key is depressed. The numeric characters become symbols or punctuation marks when the shift key is depressed. The alphabetical, numeric, and punctuation keys can also have other functions when they are pressed at the same time as some modifier keys. The Space bar is a horizontal bar in the lowermost row, which is significantly wider than other keys. Like the alphanumeric characters, it is also descended from the mechanical typewriter. Its main purpose is to enter the space between words during typing. It is large enough so that a thumb from either hand can use it easily. Depending on the operating system, when the space bar is used with a modifier key such as the control key, it may have functions such as resizing or closing the current window, half-spacing, or backspacing. In computer games and other applications the key has myriad uses in addition to its normal purpose in typing, such as jumping and adding marks to check boxes. In certain programs for playback of digital video, the space bar is used for pausing and resuming the playback.
Modifier keys[edit]
Modifier keys are special keys that modify the normal action of another key, when the two are pressed in combination. For example, + in Microsoft Windows will close the program in an active window. In contrast, pressing just will probably do nothing, unless assigned a specific function in a particular program. By themselves, modifier keys usually do nothing. The most widely used modifier keys include the Control key, Shift key and the Alt key. The AltGr key is used to access additional symbols for keys that have three symbols printed on them. On the Macintosh and Apple keyboards, the modifier keys are the Option key and Command key, respectively. On Sun Microsystems and Lisp machine keyboards, the Meta key is used as a modifier and for Windows keyboards, there is a Windows key. Compact keyboard layouts often use a Fn key. "Dead keys" allow placement of a diacritic mark, such as an accent, on the following letter (e.g., the Compose key). The Enter/Return key typically causes a command line, window form or dialog box to operate its default function, which is typically to finish an "entry" and begin the desired process. In word processing applications, pressing the enter key ends a paragraph and starts a new one.
Cursor keys[edit]
Navigation keys or cursor keys include a variety of keys which move the cursor to different positions on the screen.[23]Arrow keys are programmed to move the cursor in a specified direction; page scroll keys, such as the Page Up and Page Down keys, scroll the page up and down. The Home key is used to return the cursor to the beginning of the line where the cursor is located; the End key puts the cursor at the end of the line. The Tab key advances the cursor to the next tab stop. The Insert key is mainly used to switch between overtype mode, in which the cursor overwrites any text that is present on and after its current location, and insert mode, where the cursor inserts a character at its current position, forcing all characters past it one position further. The Delete key discards the character ahead of the cursor's position, moving all following characters one position "back" towards the freed place. On many notebook computer keyboards the key labeled Delete (sometimes Delete and Backspace are printed on the same key) serves the same purpose as a Backspace key. The Backspace key deletes the preceding character. Lock keys lock part of a keyboard, depending on the settings selected. The lock keys are scattered around the keyboard. Most styles of keyboards have three LEDs indicating which locks are enabled, in the upper right corner above the numeric pad. The lock keys include Scroll lock, Num lock (which allows the use of the numeric keypad), and Caps lock.[24]
System commands[edit]

The SysRq and Print screen commands often share the same key. SysRq was used in earlier computers as a "panic" button to recover from crashes (and it is still used in this sense to some extent by the Linux kernel; see Magic SysRq key). The Print screen command used to capture the entire screen and send it to the printer, but in the present it usually puts a screenshot in the clipboard.
Break key[edit]
The Break key/Pause key no longer has a well-defined purpose. Its origins go back to teleprinter users, who wanted a key that would temporarily interrupt the communications line. The Break key can be used by software in several different ways, such as to switch between multiple login sessions, to terminate a program, or to interrupt a modem connection. In programming, especially old DOS-style BASIC, Pascal and C, Break is used (in conjunction with Ctrl) to stop program execution. In addition to this, Linux and variants, as well as many DOS programs, treat this combination the same as Ctrl+C. On modern keyboards, the break key is usually labeled Pause/Break. In most Windows environments, the key combination Windows key+Pause brings up the system properties.
Escape key[edit]
The escape key (often abbreviated Esc) "nearly all of the time"[25] signals Stop -[26]QUIT -[27] let me "get out of a dialog"[25] (or pop-up window):[28] LET ME ESCAPE.
Another common application today of the Esc key is to trigger the Stop button in many web browsers.[29]
ESC origins[edit]
ESC was part of the standard keyboard of the Teletype Model 33 (introduced in 1964 and used with many early minicomputers).[30] The DECVT50, introduced July 1974, also had an Esc key. The TECO text editor (ca 1963) and its descendant Emacs (ca 1985) use the Esc key extensively.
Historically it also served as a type of shift key, such that one or more following characters were interpreted differently, hence the term escape sequence, which refers to a series of characters, usually preceded by the escape character.[31][32]
On machines running Microsoft Windows, prior to the implementation of the Windows key on keyboards, the typical practice for invoking the "start" button was to hold down the control key and press escape. This process still works in Windows 95, 98, Me, NT 4, 2000, XP, Vista, 7, 8, and 10.[33]
Enter key[edit]
The Enter key is located: One in the alphanumeric keys and the other one is in the numeric keys. When one worked something on their computer and wanted to do something with their work, pressing the enter key would do the command they ordered. Another function is to create a space for next paragraph. When one typed and finished typing a paragraph and they wanted to have a second paragraph, they could press enter and it would do spacing.
Shift key[edit]
Shift key: when one presses shift and a letter, it will capitalize the letter pressed with the shift key. Another use is to type more symbols than appear to be available, for instance the apostrophe key is accompanied with a quotation mark on the top. If one wants to type the quotation mark but pressed that key alone, the symbol that would appear would be the apostrophe. The quotation mark will only appear if both the required key and the Shift key are pressed.
Menu key[edit]
The Menu key or Application key is a key found on Windows-oriented computer keyboards. It is used to launch a context menu with the keyboard rather than with the usual right mouse button. The key's symbol is usually a small icon depicting a cursor hovering above a menu. On some Samsung keyboards the cursor in the icon is not present, showing the menu only. This key was created at the same time as the Windows key. This key is normally used when the right mouse button is not present on the mouse. Some Windows public terminals do not have a Menu key on their keyboard to prevent users from right-clicking (however, in many Windows applications, a similar functionality can be invoked with the Shift+F10 keyboard shortcut).
Number pad[edit]
Many, but not all, computer keyboards have a numeric keypad to the right of the alphabetic keyboard, often separated from the other groups of keys such as the function keys and system command keys, which contains numbers, basic mathematical symbols (e.g., addition, subtraction, etc.), and a few function keys. In addition to the row of number keys above the top alphabetic row, most desktop keyboards have a number pad or accounting pad, on the right hand side of the keyboard. While num lock is set, the numbers on these keys duplicate the number row; if not, they have alternative functions as engraved. In addition to numbers, this pad has command symbols concerned with calculations such as addition, subtraction, multiplication and division symbols. The enter key in this keys indicate the equal sign.
Miscellaneous[edit]

On Japanese/Korean keyboards, there may be Language input keys for changing the language to use. Some keyboards have power management keys (e.g., power key, sleep key and wake key); Internet keys to access a web browser or E-mail; and/or multimedia keys, such as volume controls; or keys that can be programmed by the user to launch a specified application or a command like minimizing all windows.
Multiple layouts[edit]
It is possible to install multiple keyboard layouts within an operating system and switch between them, either through features implemented within the OS, or through an external application. Microsoft Windows,[34] Linux,[35] and Mac[36] provide support to add keyboard layouts and choose from them.
Illumination[edit]
Keyboards and keypads may be illuminated from inside, especially on equipment for mobile use. Both keyboards built into computers and external ones may support backlighting; external backlit keyboards may have a wired USB connection, or be connected wirelessly and powered by batteries. Illumination facilitates the use of the keyboard or keypad in dark environments.
For general productivity, only the keys may be uniformly backlit, without distracting light around the keys.

Many gaming keyboards are designed to have an aesthetic as well as functional appeal, with multiple colours, and colour-coded keys to make it easier for gamers to find command keys while playing in a dark room.[37] Many keyboards not otherwise illuminated may have small LED indicator lights in a few important function keys, or elsewhere on the housing, if their function is activated (see photo).
Technology[edit]
Key switches[edit]
In the first electronic keyboards in the early 1970s, the key switches were individual switches inserted into holes in metal frames. These keyboards cost from 80 to 120 USD and were used in mainframe data terminals. The most popular switch types were reed switches (contacts enclosed in a vacuum in a glass capsule, affected by a magnet mounted on the switch plunger).[citation needed]
In the mid-1970s, lower-cost direct-contact key switches were introduced, but their life in switch cycles was much shorter (rated ten million cycles) because they were open to the environment. This became more acceptable, however, for use in computer terminals at the time, which began to see increasingly shorter model lifespans as they advanced.[38]
In 1978, Key Tronic Corporation introduced keyboards with capacitive-based switches, one of the first keyboard technologies not to use self-contained switches.[39] There was simply a sponge pad with a conductive-coated Mylar plastic sheet on the switch plunger, and two half-moon trace patterns on the printed circuit board below. As the key was depressed, the capacitance between the plunger pad and the patterns on the PCB below changed, which was detected by integrated circuits (IC). These keyboards were claimed to have the same reliability as the other "solid-state switch" keyboards such as inductive and Hall-effect, but competitive with direct-contact keyboards. Prices of $60 for keyboards were achieved, and Key Tronic rapidly became the largest independent keyboard manufacturer.
Meanwhile, IBM made their own keyboards, using their own patented technology: Keys on older IBM keyboards[40] were made with a "buckling spring" mechanism, in which a coil spring under the key buckles under pressure from the user's finger, triggering a hammer that presses two plastic sheets (membranes) with conductive traces together, completing a circuit. This produces a clicking sound and gives physical feedback for the typist, indicating that the key has been depressed.[41]
The first electronic keyboards had a typewriter key travel distance of 0.187 inches (4.75 mm), keytops were a half-inch (12.7 mm) high, and keyboards were about two inches (5 cm) thick. Over time, less key travel was accepted in the market, finally landing on 0.110 inches (2.79 mm). Coincident with this, Key Tronic was the first company to introduce a keyboard that was only about one inch thick. And now keyboards measure only about a half-inch thick.

Keytops are an important element of keyboards. In the beginning, keyboard keytops had a "dish shape" on top, like typewriters before them. Keyboard key legends must be extremely durable over tens of millions of depressions, since they are subjected to extreme mechanical wear from fingers and fingernails, and subject to hand oils and creams, so engraving and filling key legends with paint, as was done previously for individual switches, was never acceptable. So, for the first electronic keyboards, the key legends were produced by two-shot (or double-shot, or two-color) molding, where either the key shell or the inside of the key with the key legend was molded first, and then the other color molded second. But, to save cost, other methods were explored, such as sublimation printing and laser engraving, both methods which could be used to print a whole keyboard at the same time.
Initially, sublimation printing, where a special ink is printed onto the keycap surface and the application of heat causes the ink molecules to penetrate and commingle with the plastic modules, had a problem because finger oils caused the molecules to disperse, but then a necessarily very hard clear coating was applied to prevent this. Coincident with sublimation printing, which was first used in high volume by IBM on their keyboards, was the introduction by IBM of single-curved-dish keycaps to facilitate quality printing of key legends by having a consistently curved surface instead of a dish. But one problem with sublimation or laser printing was that the processes took too long and only dark legends could be printed on light-colored keys. On another note, IBM was unique in using separate shells, or "keycaps", on keytop bases. This might have made their manufacturing of different keyboard layouts more flexible, but the reason for doing this was that the plastic material that needed to be used for sublimation printing was different from standard ABS keytop plastic material.
Three final mechanical technologies brought keyboards to where they are today, driving the cost well under $10:
- "Monoblock" keyboard designs were developed where individual switch housings were eliminated and a one-piece "monoblock" housing used instead. This was possible because of molding techniques that could provide very tight tolerances for the switch-plunger holes and guides across the width of the keyboard so that the key plunger-to-housing clearances were not too tight or too loose, either of which could cause the keys to bind.
- The use of contact-switch membrane sheets under the monoblock. This technology came from flat-panel switch membranes, where the switch contacts are printed inside of a top and bottom layer, with a spacer layer in between, so that when pressure is applied to the area above, a direct electrical contact is made. The membrane layers can be printed by very-high volume, low-cost "reel-to-reel" printing machines, with each keyboard membrane cut and punched out afterwards.
Plastic materials played a very important part in the development and progress of electronic keyboards. Until "monoblocks" came along, GE's "self-lubricating" Delrin was the only plastic material for keyboard switch plungers that could withstand the beating over tens of millions of cycles of lifetime use. Greasing or oiling switch plungers was undesirable because it would attract dirt over time which would eventually affect the feel and even bind the key switches (although keyboard manufacturers would sometimes sneak this into their keyboards, especially if they could not control the tolerances of the key plungers and housings well enough to have a smooth key depression feel or prevent binding). But Delrin was only available in black and white, and was not suitable for keytops (too soft), so keytops use ABS plastic. However, as plastic molding advanced in maintaining tight tolerances, and as key travel length reduced from 0.187-inch to 0.110-inch (4.75 mm to 2.79 mm), single-part keytop/plungers could be made of ABS, with the keyboard monoblocks also made of ABS.
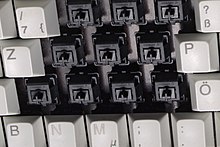
In common use, the term "mechanical keyboard" refers to a keyboard with individual mechanical key switches, each of which contains a fully encased plunger with a spring below it and metallic electrical contacts on a side. The plunger sits on the spring and the key will often close the contacts when the plunger is pressed half-way. Other switches require the plunger to be fully pressed down. The depth at which the plunger must be pressed for the contacts to close is known as the activation distance. Analog keyboards with key switches whose activation distance can be reconfigured through software, optical switches that work by blocking laser beams, and Hall Effect keyboards that use key switches that use a magnet to activate a hall sensor, are also available.
Control processor[edit]

Computer keyboards include control circuitry to convert key presses into key codes[42] (usually scancodes) that the computer's electronics can understand. The key switches are connected via the printed circuit board in an electrical X-Y matrix where a voltage is provided sequentially to the Y lines and, when a key is depressed, detected sequentially by scanning the X lines.
The first computer keyboards were for mainframe computer data terminals and used discrete electronic parts. The first keyboard microprocessor was introduced in 1972 by General Instruments, but keyboards have been using the single-chip 8048microcontroller variant since it became available in 1978.[43] The keyboard switch matrix is wired to its inputs, it converts the keystrokes to key codes, and, for a detached keyboard, sends the codes down a serial cable (the keyboard cord) to the main processor on the computer motherboard. This serial keyboard cable communication is only bi-directional to the extent that the computer's electronics controls the illumination of the caps lock, num lock and scroll lock lights.
One test for whether the computer has crashed is pressing the caps lock key. The keyboard sends the key code to the keyboard driver running in the main computer; if the main computer is operating, it commands the light to turn on. All the other indicator lights work in a similar way. The keyboard driver also tracks the Shift, alt and control state of the keyboard.
Some lower-quality keyboards have multiple or false key entries due to inadequate electrical designs. These are caused by inadequate keyswitch "debouncing" or inadequate keyswitch matrix layout that don't allow multiple keys to be depressed at the same time, both circumstances which are explained below:
When pressing a keyboard key, the key contacts may "bounce" against each other for several milliseconds before they settle into firm contact. When released, they bounce some more until they revert to the uncontacted state. If the computer were watching for each pulse, it would see many keystrokes for what the user thought was just one. To resolve this problem, the processor in a keyboard (or computer) "debounces" the keystrokes, by aggregating them across time to produce one "confirmed" keystroke.
Some low-quality keyboards also suffer problems with rollover (that is, when multiple keys pressed at the same time, or when keys are pressed so fast that multiple keys are down within the same milliseconds). Early "solid-state" keyswitch keyboards did not have this problem because the keyswitches are electrically isolated from each other, and early "direct-contact" keyswitch keyboards avoided this problem by having isolation diodes for every keyswitch. These early keyboards had "n-key" rollover, which means any number of keys can be depressed and the keyboard will still recognize the next key depressed. But when three keys are pressed (electrically closed) at the same time in a "direct contact" keyswitch matrix that doesn't have isolation diodes, the keyboard electronics can see a fourth "phantom" key which is the intersection of the X and Y lines of the three keys. Some types of keyboard circuitry will register a maximum number of keys at one time. "Three-key" rollover, also called "phantom key blocking" or "phantom key lockout", will only register three keys and ignore all others until one of the three keys is lifted. This is undesirable, especially for fast typing (hitting new keys before the fingers can release previous keys), and games (designed for multiple key presses).
As direct-contact membrane keyboards became popular, the available rollover of keys was optimized by analyzing the most common key sequences and placing these keys so that they do not potentially produce phantom keys in the electrical key matrix (for example, simply placing three or four keys that might be depressed simultaneously on the same X or same Y line, so that a phantom key intersection/short cannot happen), so that blocking a third key usually isn't a problem. But lower-quality keyboard designs and unknowledgeable engineers may not know these tricks, and it can still be a problem in games due to wildly different or configurable layouts in different games.
Connection types[edit]

There are several ways of connecting a keyboard to a system unit (more precisely, to its keyboard controller) using cables, including the standard AT connector commonly found on motherboards, which was eventually replaced by the PS/2 and the USB connection. Prior to the iMac line of systems, Apple used the proprietary Apple Desktop Bus for its keyboard connector.
Wireless keyboards have become popular. A wireless keyboard must have a transmitter built in, and a receiver connected to the computer's keyboard port; it communicates either by radio frequency (RF) or infrared (IR) signals. A wireless keyboard may use industry standard Bluetooth radio communication, in which case the receiver may be built into the computer. Wireless keyboards need batteries for power, and may be at risk of data eavesdropping. Wireless solar keyboards charge their batteries from small solar panels using natural or artificial light. The 1984 Apricot Portable is an early example of an IR keyboard.
Alternative text-entering methods[edit]

Optical character recognition (OCR) is preferable to rekeying for converting existing text that is already written down but not in machine-readable format (for example, a Linotype-composed book from the 1940s). In other words, to convert the text from an image to editable text (that is, a string of character codes), a person could re-type it, or a computer could look at the image and deduce what each character is. OCR technology has already reached an impressive state (for example, Google Book Search) and promises more for the future.
Speech recognition converts speech into machine-readable text (that is, a string of character codes). This technology has also reached an advanced state and is implemented in various software products. For certain uses (e.g., transcription of medical or legal dictation; journalism; writing essays or novels) speech recognition is starting to replace the keyboard. However, the lack of privacy when issuing voice commands and dictation makes this kind of input unsuitable for many environments.
Pointing devices can be used to enter text or characters in contexts where using a physical keyboard would be inappropriate or impossible. These accessories typically present characters on a display, in a layout that provides fast access to the more frequently used characters or character combinations. Popular examples of this kind of input are Graffiti, Dasher and on-screen virtual keyboards.
Other issues[edit]
Keystroke logging[edit]
Unencrypted wireless Bluetooth keyboards are known to be vulnerable to signal theft by placing a covert listening device in the same room as the keyboard to sniff and record Bluetooth packets for the purpose of logging keys typed by the user. Microsoft wireless keyboards 2011 and earlier are documented to have this vulnerability.[44]
Keystroke logging (often called keylogging) is a method of capturing and recording user keystrokes. While it is used legally to measure employee productivity on certain clerical tasks, or by law enforcement agencies to find out about illegal activities, it is also used by hackers for various illegal or malicious acts. Hackers use keyloggers as a means to obtain passwords or encryption keys and thus bypass other security measures.
Keystroke logging can be achieved by both hardware and software means. Hardware key loggers are attached to the keyboard cable or installed inside standard keyboards. Software keyloggers work on the target computer's operating system and gain unauthorized access to the hardware, hook into the keyboard with functions provided by the OS, or use remote access software to transmit recorded data out of the target computer to a remote location. Some hackers also use wireless keylogger sniffers to collect packets of data being transferred from a wireless keyboard and its receiver, and then they crack the encryption key being used to secure wireless communications between the two devices.
Anti-spyware applications are able to detect many keyloggers and cleanse them. Responsible vendors of monitoring software support detection by anti-spyware programs, thus preventing abuse of the software. Enabling a firewall does not stop keyloggers per se, but can possibly prevent transmission of the logged material over the net if properly configured. Network monitors (also known as reverse-firewalls) can be used to alert the user whenever an application attempts to make a network connection. This gives the user the chance to prevent the keylogger from "
Chapter 4: Configuring PuTTY
Previous | Contents | Index | Next
This chapter describes all the configuration options in PuTTY.
PuTTY is configured using the control panel that comes up before you start a session. Some options can also be changed in the middle of a session, by selecting ‘Change Settings’ from the window menu.
4.1 The Session panel
The Session configuration panel contains the basic options you need to specify in order to open a session at all, and also allows you to save your settings to be reloaded later.
4.1.1 The host name section
The top box on the Session panel, labelled ‘Specify your connection by host name’, contains the details that need to be filled in before PuTTY can open a session at all.
- The ‘Host Name’ box is where you type the name, or the IP address, of the server you want to connect to.
- The ‘Connection type’ radio buttons let you choose what type of connection you want to make: a raw connection, a Telnet connection, an Rlogin connection, an SSH connection, or a connection to a local serial line. (See section 1.2 for a summary of the differences between SSH, Telnet and rlogin; see section 3.6 for an explanation of ‘raw’ connections; see section 3.7 for information about using a serial line.)
- The ‘Port’ box lets you specify which port number on the server to connect to. If you select Telnet, Rlogin, or SSH, this box will be filled in automatically to the usual value, and you will only need to change it if you have an unusual server. If you select Raw mode, you will almost certainly need to fill in the ‘Port’ box yourself.
If you select ‘Serial’ from the ‘Connection type’ radio buttons, the ‘Host Name’ and ‘Port’ boxes are replaced by ‘Serial line’ and ‘Speed’; see section 4.28 for more details of these.
4.1.2 Loading and storing saved sessions
The next part of the Session configuration panel allows you to save your preferred PuTTY options so they will appear automatically the next time you start PuTTY. It also allows you to create saved sessions, which contain a full set of configuration options plus a host name and protocol. A saved session contains all the information PuTTY needs to start exactly the session you want.
- To save your default settings: first set up the settings the way you want them saved. Then come back to the Session panel. Select the ‘Default Settings’ entry in the saved sessions list, with a single click. Then press the ‘Save’ button.
If there is a specific host you want to store the details of how to connect to, you should create a saved session, which will be separate from the Default Settings.
- To save a session: first go through the rest of the configuration box setting up all the options you want. Then come back to the Session panel. Enter a name for the saved session in the ‘Saved Sessions’ input box. (The server name is often a good choice for a saved session name.) Then press the ‘Save’ button. Your saved session name should now appear in the list box.
You can also save settings in mid-session, from the ‘Change Settings’ dialog. Settings changed since the start of the session will be saved with their current values; as well as settings changed through the dialog, this includes changes in window size, window title changes sent by the server, and so on.
- To reload a saved session: single-click to select the session name in the list box, and then press the ‘Load’ button. Your saved settings should all appear in the configuration panel.
- To modify a saved session: first load it as described above. Then make the changes you want. Come back to the Session panel, and press the ‘Save’ button. The new settings will be saved over the top of the old ones.
To save the new settings under a different name, you can enter the new name in the ‘Saved Sessions’ box, or single-click to select a session name in the list box to overwrite that session. To save ‘Default Settings’, you must single-click the name before saving.
- To start a saved session immediately: double-click on the session name in the list box.
- To delete a saved session: single-click to select the session name in the list box, and then press the ‘Delete’ button.
Each saved session is independent of the Default Settings configuration. If you change your preferences and update Default Settings, you must also update every saved session separately.
Saved sessions are stored in the Registry, at the location
If you need to store them in a file, you could try the method described in section 4.29.
4.1.3 ‘Close Window on Exit’
Finally in the Session panel, there is an option labelled ‘Close Window on Exit’. This controls whether the PuTTY terminal window disappears as soon as the session inside it terminates. If you are likely to want to copy and paste text out of the session after it has terminated, or restart the session, you should arrange for this option to be off.
‘Close Window On Exit’ has three settings. ‘Always’ means always close the window on exit; ‘Never’ means never close on exit (always leave the window open, but inactive). The third setting, and the default one, is ‘Only on clean exit’. In this mode, a session which terminates normally will cause its window to close, but one which is aborted unexpectedly by network trouble or a confusing message from the server will leave the window up.
4.2 The Logging panel
The Logging configuration panel allows you to save log files of your PuTTY sessions, for debugging, analysis or future reference.
The main option is a radio-button set that specifies whether PuTTY will log anything at all. The options are:
- ‘None’. This is the default option; in this mode PuTTY will not create a log file at all.
- ‘Printable output’. In this mode, a log file will be created and written to, but only printable text will be saved into it. The various terminal control codes that are typically sent down an interactive session alongside the printable text will be omitted. This might be a useful mode if you want to read a log file in a text editor and hope to be able to make sense of it.
- ‘All session output’. In this mode, everything sent by the server into your terminal session is logged. If you view the log file in a text editor, therefore, you may well find it full of strange control characters. This is a particularly useful mode if you are experiencing problems with PuTTY's terminal handling: you can record everything that went to the terminal, so that someone else can replay the session later in slow motion and watch to see what went wrong.
- ‘SSH packets’. In this mode (which is only used by SSH connections), the SSH message packets sent over the encrypted connection are written to the log file (as well as Event Log entries). You might need this to debug a network-level problem, or more likely to send to the PuTTY authors as part of a bug report. BE WARNED that if you log in using a password, the password can appear in the log file; see section 4.2.4 for options that may help to remove sensitive material from the log file before you send it to anyone else.
- ‘SSH packets and raw data’. In this mode, as well as the decrypted packets (as in the previous mode), the raw (encrypted, compressed, etc) packets are also logged. This could be useful to diagnose corruption in transit. (The same caveats as the previous mode apply, of course.)
Note that the non-SSH logging options (‘Printable output’ and ‘All session output’) only work with PuTTY proper; in programs without terminal emulation (such as Plink), they will have no effect, even if enabled via saved settings.
4.2.1 ‘Log file name’
In this edit box you enter the name of the file you want to log the session to. The ‘Browse’ button will let you look around your file system to find the right place to put the file; or if you already know exactly where you want it to go, you can just type a pathname into the edit box.
There are a few special features in this box. If you use the character in the file name box, PuTTY will insert details of the current session in the name of the file it actually opens. The precise replacements it will do are:
- will be replaced by the current year, as four digits.
- will be replaced by the current month, as two digits.
- will be replaced by the current day of the month, as two digits.
- will be replaced by the current time, as six digits (HHMMSS) with no punctuation.
- will be replaced by the host name you are connecting to.
- will be replaced by the port number you are connecting to on the target host.
For example, if you enter the host name , you will end up with files looking like
4.2.2 ‘What to do if the log file already exists’
This control allows you to specify what PuTTY should do if it tries to start writing to a log file and it finds the file already exists. You might want to automatically destroy the existing log file and start a new one with the same name. Alternatively, you might want to open the existing log file and add data to the end of it. Finally (the default option), you might not want to have any automatic behaviour, but to ask the user every time the problem comes up.
4.2.3 ‘Flush log file frequently’
This option allows you to control how frequently logged data is flushed to disc. By default, PuTTY will flush data as soon as it is displayed, so that if you view the log file while a session is still open, it will be up to date; and if the client system crashes, there's a greater chance that the data will be preserved.
However, this can incur a performance penalty. If PuTTY is running slowly with logging enabled, you could try unchecking this option. Be warned that the log file may not always be up to date as a result (although it will of course be flushed when it is closed, for instance at the end of a session).
4.2.4 Options specific to SSH packet logging
These options only apply if SSH packet data is being logged.
The following options allow particularly sensitive portions of unencrypted packets to be automatically left out of the log file. They are only intended to deter casual nosiness; an attacker could glean a lot of useful information from even these obfuscated logs (e.g., length of password).
4.2.4.1 ‘Omit known password fields’
When checked, decrypted password fields are removed from the log of transmitted packets. (This includes any user responses to challenge-response authentication methods such as ‘keyboard-interactive’.) This does not include X11 authentication data if using X11 forwarding.
Note that this will only omit data that PuTTY knows to be a password. However, if you start another login session within your PuTTY session, for instance, any password used will appear in the clear in the packet log. The next option may be of use to protect against this.
This option is enabled by default.
4.2.4.2 ‘Omit session data’
When checked, all decrypted ‘session data’ is omitted; this is defined as data in terminal sessions and in forwarded channels (TCP, X11, and authentication agent). This will usually substantially reduce the size of the resulting log file.
This option is disabled by default.
4.3 The Terminal panel
The Terminal configuration panel allows you to control the behaviour of PuTTY's terminal emulation.
4.3.1 ‘Auto wrap mode initially on’
Auto wrap mode controls what happens when text printed in a PuTTY window reaches the right-hand edge of the window.
With auto wrap mode on, if a long line of text reaches the right-hand edge, it will wrap over on to the next line so you can still see all the text. With auto wrap mode off, the cursor will stay at the right-hand edge of the screen, and all the characters in the line will be printed on top of each other.
If you are running a full-screen application and you occasionally find the screen scrolling up when it looks as if it shouldn't, you could try turning this option off.
Auto wrap mode can be turned on and off by control sequences sent by the server. This configuration option controls the default state, which will be restored when you reset the terminal (see section 3.1.3.6). However, if you modify this option in mid-session using ‘Change Settings’, it will take effect immediately.
4.3.2 ‘DEC Origin Mode initially on’
DEC Origin Mode is a minor option which controls how PuTTY interprets cursor-position control sequences sent by the server.
The server can send a control sequence that restricts the scrolling region of the display. For example, in an editor, the server might reserve a line at the top of the screen and a line at the bottom, and might send a control sequence that causes scrolling operations to affect only the remaining lines.
With DEC Origin Mode on, cursor coordinates are counted from the top of the scrolling region. With it turned off, cursor coordinates are counted from the top of the whole screen regardless of the scrolling region.
It is unlikely you would need to change this option, but if you find a full-screen application is displaying pieces of text in what looks like the wrong part of the screen, you could try turning DEC Origin Mode on to see whether that helps.
DEC Origin Mode can be turned on and off by control sequences sent by the server. This configuration option controls the default state, which will be restored when you reset the terminal (see section 3.1.3.6). However, if you modify this option in mid-session using ‘Change Settings’, it will take effect immediately.
4.3.3 ‘Implicit CR in every LF’
Most servers send two control characters, CR and LF, to start a new line of the screen. The CR character makes the cursor return to the left-hand side of the screen. The LF character makes the cursor move one line down (and might make the screen scroll).
Some servers only send LF, and expect the terminal to move the cursor over to the left automatically. If you come across a server that does this, you will see a stepped effect on the screen, like this:
If this happens to you, try enabling the ‘Implicit CR in every LF’ option, and things might go back to normal:
4.3.4 ‘Implicit LF in every CR’
Most servers send two control characters, CR and LF, to start a new line of the screen. The CR character makes the cursor return to the left-hand side of the screen. The LF character makes the cursor move one line down (and might make the screen scroll).
Some servers only send CR, and so the newly written line is overwritten by the following line. This option causes a line feed so that all lines are displayed.
4.3.5 ‘Use background colour to erase screen’
Not all terminals agree on what colour to turn the screen when the server sends a ‘clear screen’ sequence. Some terminals believe the screen should always be cleared to the default background colour. Others believe the screen should be cleared to whatever the server has selected as a background colour.
There exist applications that expect both kinds of behaviour. Therefore, PuTTY can be configured to do either.
With this option disabled, screen clearing is always done in the default background colour. With this option enabled, it is done in the current background colour.
Background-colour erase can be turned on and off by control sequences sent by the server. This configuration option controls the default state, which will be restored when you reset the terminal (see section 3.1.3.6). However, if you modify this option in mid-session using ‘Change Settings’, it will take effect immediately.
4.3.6 ‘Enable blinking text’
The server can ask PuTTY to display text that blinks on and off. This is very distracting, so PuTTY allows you to turn blinking text off completely.
When blinking text is disabled and the server attempts to make some text blink, PuTTY will instead display the text with a bolded background colour.
Blinking text can be turned on and off by control sequences sent by the server. This configuration option controls the default state, which will be restored when you reset the terminal (see section 3.1.3.6). However, if you modify this option in mid-session using ‘Change Settings’, it will take effect immediately.
4.3.7 ‘Answerback to ^E’
This option controls what PuTTY will send back to the server if the server sends it the ^E enquiry character. Normally it just sends the string ‘PuTTY’.
If you accidentally write the contents of a binary file to your terminal, you will probably find that it contains more than one ^E character, and as a result your next command line will probably read ‘PuTTYPuTTYPuTTY...’ as if you had typed the answerback string multiple times at the keyboard. If you set the answerback string to be empty, this problem should go away, but doing so might cause other problems.
Note that this is not the feature of PuTTY which the server will typically use to determine your terminal type. That feature is the ‘Terminal-type string’ in the Connection panel; see section 4.14.3 for details.
You can include control characters in the answerback string using notation. (Use to get a literal .)
4.3.8 ‘Local echo’
With local echo disabled, characters you type into the PuTTY window are not echoed in the window by PuTTY. They are simply sent to the server. (The server might choose to echo them back to you; this can't be controlled from the PuTTY control panel.)
Some types of session need local echo, and many do not. In its default mode, PuTTY will automatically attempt to deduce whether or not local echo is appropriate for the session you are working in. If you find it has made the wrong decision, you can use this configuration option to override its choice: you can force local echo to be turned on, or force it to be turned off, instead of relying on the automatic detection.
4.3.9 ‘Local line editing’
Normally, every character you type into the PuTTY window is sent immediately to the server the moment you type it.
If you enable local line editing, this changes. PuTTY will let you edit a whole line at a time locally, and the line will only be sent to the server when you press Return. If you make a mistake, you can use the Backspace key to correct it before you press Return, and the server will never see the mistake.
Since it is hard to edit a line locally without being able to see it, local line editing is mostly used in conjunction with local echo (section 4.3.8). This makes it ideal for use in raw mode or when connecting to MUDs or talkers. (Although some more advanced MUDs do occasionally turn local line editing on and turn local echo off, in order to accept a password from the user.)
Some types of session need local line editing, and many do not. In its default mode, PuTTY will automatically attempt to deduce whether or not local line editing is appropriate for the session you are working in. If you find it has made the wrong decision, you can use this configuration option to override its choice: you can force local line editing to be turned on, or force it to be turned off, instead of relying on the automatic detection.
4.3.10 Remote-controlled printing
A lot of VT100-compatible terminals support printing under control of the remote server. PuTTY supports this feature as well, but it is turned off by default.
To enable remote-controlled printing, choose a printer from the ‘Printer to send ANSI printer output to’ drop-down list box. This should allow you to select from all the printers you have installed drivers for on your computer. Alternatively, you can type the network name of a networked printer (for example, ) even if you haven't already installed a driver for it on your own machine.
When the remote server attempts to print some data, PuTTY will send that data to the printer raw - without translating it, attempting to format it, or doing anything else to it. It is up to you to ensure your remote server knows what type of printer it is talking to.
Since PuTTY sends data to the printer raw, it cannot offer options such as portrait versus landscape, print quality, or paper tray selection. All these things would be done by your PC printer driver (which PuTTY bypasses); if you need them done, you will have to find a way to configure your remote server to do them.
To disable remote printing again, choose ‘None (printing disabled)’ from the printer selection list. This is the default state.
4.4 The Keyboard panel
The Keyboard configuration panel allows you to control the behaviour of the keyboard in PuTTY. The correct state for many of these settings depends on what the server to which PuTTY is connecting expects. With a Unix server, this is likely to depend on the or entry it uses, which in turn is likely to be controlled by the ‘Terminal-type string’ setting in the Connection panel; see section 4.14.3 for details. If none of the settings here seems to help, you may find question A.7.15 to be useful.
4.4.1 Changing the action of the Backspace key
Some terminals believe that the Backspace key should send the same thing to the server as Control-H (ASCII code 8). Other terminals believe that the Backspace key should send ASCII code 127 (usually known as Control-?) so that it can be distinguished from Control-H. This option allows you to choose which code PuTTY generates when you press Backspace.
If you are connecting over SSH, PuTTY by default tells the server the value of this option (see section 4.24.2), so you may find that the Backspace key does the right thing either way. Similarly, if you are connecting to a Unix system, you will probably find that the Unix command lets you configure which the server expects to see, so again you might not need to change which one PuTTY generates. On other systems, the server's expectation might be fixed and you might have no choice but to configure PuTTY.
If you do have the choice, we recommend configuring PuTTY to generate Control-? and configuring the server to expect it, because that allows applications such as to use Control-H for help.
(Typing Shift-Backspace will cause PuTTY to send whichever code isn't configured here as the default.)
4.4.2 Changing the action of the Home and End keys
The Unix terminal emulator disagrees with the rest of the world about what character sequences should be sent to the server by the Home and End keys.
, and other terminals, send for the Home key, and for the End key. sends for the Home key and for the End key.
If you find an application on which the Home and End keys aren't working, you could try switching this option to see if it helps.
4.4.3 Changing the action of the function keys and keypad
This option affects the function keys (F1 to F12) and the top row of the numeric keypad.
- In the default mode, labelled , the function keys generate sequences like , and so on. This matches the general behaviour of Digital's terminals.
- In Linux mode, F6 to F12 behave just like the default mode, but F1 to F5 generate through to . This mimics the Linux virtual console.
- In Xterm R6 mode, F5 to F12 behave like the default mode, but F1 to F4 generate through to , which are the sequences produced by the top row of the keypad on Digital's terminals.
- In VT400 mode, all the function keys behave like the default mode, but the actual top row of the numeric keypad generates through to .
- In VT100+ mode, the function keys generate through to
- In SCO mode, the function keys F1 to F12 generate through to . Together with shift, they generate through to . With control they generate through to , and with shift and control together they generate through to .
If you don't know what any of this means, you probably don't need to fiddle with it.
4.4.4 Controlling Application Cursor Keys mode
Application Cursor Keys mode is a way for the server to change the control sequences sent by the arrow keys. In normal mode, the arrow keys send through to . In application mode, they send through to .
Application Cursor Keys mode can be turned on and off by the server, depending on the application. PuTTY allows you to configure the initial state.
You can also disable application cursor keys mode completely, using the ‘Features’ configuration panel; see section 4.6.1.
4.4.5 Controlling Application Keypad mode
Application Keypad mode is a way for the server to change the behaviour of the numeric keypad.
In normal mode, the keypad behaves like a normal Windows keypad: with NumLock on, the number keys generate numbers, and with NumLock off they act like the arrow keys and Home, End etc.
In application mode, all the keypad keys send special control sequences, including Num Lock. Num Lock stops behaving like Num Lock and becomes another function key.
Depending on which version of Windows you run, you may find the Num Lock light still flashes on and off every time you press Num Lock, even when application mode is active and Num Lock is acting like a function key. This is unavoidable.
Application keypad mode can be turned on and off by the server, depending on the application. PuTTY allows you to configure the initial state.
You can also disable application keypad mode completely, using the ‘Features’ configuration panel; see section 4.6.1.
4.4.6 Using NetHack keypad mode
PuTTY has a special mode for playing NetHack. You can enable it by selecting ‘NetHack’ in the ‘Initial state of numeric keypad’ control.
In this mode, the numeric keypad keys 1-9 generate the NetHack movement commands (). The 5 key generates the command (do nothing).
In addition, pressing Shift or Ctrl with the keypad keys generate the Shift- or Ctrl-keys you would expect (e.g. keypad-7 generates ‘’, so Shift-keypad-7 generates ‘’ and Ctrl-keypad-7 generates Ctrl-Y); these commands tell NetHack to keep moving you in the same direction until you encounter something interesting.
For some reason, this feature only works properly when Num Lock is on. We don't know why.
4.4.7 Enabling a DEC-like Compose key
DEC terminals have a Compose key, which provides an easy-to-remember way of typing accented characters. You press Compose and then type two more characters. The two characters are ‘combined’ to produce an accented character. The choices of character are designed to be easy to remember; for example, composing ‘e’ and ‘`’ produces the ‘è’ character.
If your keyboard has a Windows Application key, it acts as a Compose key in PuTTY. Alternatively, if you enable the ‘AltGr acts as Compose key’ option, the AltGr key will become a Compose key.
4.4.8 ‘Control-Alt is different from AltGr’
Some old keyboards do not have an AltGr key, which can make it difficult to type some characters. PuTTY can be configured to treat the key combination Ctrl + Left Alt the same way as the AltGr key.
By default, this checkbox is checked, and the key combination Ctrl + Left Alt does something completely different. PuTTY's usual handling of the left Alt key is to prefix the Escape (Control-) character to whatever character sequence the rest of the keypress would generate. For example, Alt-A generates Escape followed by . So Alt-Ctrl-A would generate Escape, followed by Control-A.
If you uncheck this box, Ctrl-Alt will become a synonym for AltGr, so you can use it to type extra graphic characters if your keyboard has any.
(However, Ctrl-Alt will never act as a Compose key, regardless of the setting of ‘AltGr acts as Compose key’ described in section 4.4.7.)
4.5 The Bell panel
The Bell panel controls the terminal bell feature: the server's ability to cause PuTTY to beep at you.
In the default configuration, when the server sends the character with ASCII code 7 (Control-G), PuTTY will play the Windows Default Beep sound. This is not always what you want the terminal bell feature to do; the Bell panel allows you to configure alternative actions.
4.5.1 ‘Set the style of bell’
This control allows you to select various different actions to occur on a terminal bell:
- Selecting ‘None’ disables the bell completely. In this mode, the server can send as many Control-G characters as it likes and nothing at all will happen.
- ‘Make default system alert sound’ is the default setting. It causes the Windows ‘Default Beep’ sound to be played. To change what this sound is, or to test it if nothing seems to be happening, use the Sound configurer in the Windows Control Panel.
- ‘Visual bell’ is a silent alternative to a beeping computer. In this mode, when the server sends a Control-G, the whole PuTTY window will flash white for a fraction of a second.
- ‘Beep using the PC speaker’ is self-explanatory.
- ‘Play a custom sound file’ allows you to specify a particular sound file to be used by PuTTY alone, or even by a particular individual PuTTY session. This allows you to distinguish your PuTTY beeps from any other beeps on the system. If you select this option, you will also need to enter the name of your sound file in the edit control ‘Custom sound file to play as a bell’.
4.5.2 ‘Taskbar/caption indication on bell’
This feature controls what happens to the PuTTY window's entry in the Windows Taskbar if a bell occurs while the window does not have the input focus.
In the default state (‘Disabled’) nothing unusual happens.
If you select ‘Steady’, then when a bell occurs and the window is not in focus, the window's Taskbar entry and its title bar will change colour to let you know that PuTTY session is asking for your attention. The change of colour will persist until you select the window, so you can leave several PuTTY windows minimised in your terminal, go away from your keyboard, and be sure not to have missed any important beeps when you get back.
‘Flashing’ is even more eye-catching: the Taskbar entry will continuously flash on and off until you select the window.
4.5.3 ‘Control the bell overload behaviour’
A common user error in a terminal session is to accidentally run the Unix command (or equivalent) on an inappropriate file type, such as an executable, image file, or ZIP file. This produces a huge stream of non-text characters sent to the terminal, which typically includes a lot of bell characters. As a result of this the terminal often doesn't stop beeping for ten minutes, and everybody else in the office gets annoyed.
To try to avoid this behaviour, or any other cause of excessive beeping, PuTTY includes a bell overload management feature. In the default configuration, receiving more than five bell characters in a two-second period will cause the overload feature to activate. Once the overload feature is active, further bells will have no effect at all, so the rest of your binary file will be sent to the screen in silence. After a period of five seconds during which no further bells are received, the overload feature will turn itself off again and bells will be re-enabled.
If you want this feature completely disabled, you can turn it off using the checkbox ‘Bell is temporarily disabled when over-used’.
Alternatively, if you like the bell overload feature but don't agree with the settings, you can configure the details: how many bells constitute an overload, how short a time period they have to arrive in to do so, and how much silent time is required before the overload feature will deactivate itself.
Bell overload mode is always deactivated by any keypress in the terminal. This means it can respond to large unexpected streams of data, but does not interfere with ordinary command-line activities that generate beeps (such as filename completion).
4.6 The Features panel
PuTTY's terminal emulation is very highly featured, and can do a lot of things under remote server control. Some of these features can cause problems due to buggy or strangely configured server applications.
The Features configuration panel allows you to disable some of PuTTY's more advanced terminal features, in case they cause trouble.
4.6.1 Disabling application keypad and cursor keys
Application keypad mode (see section 4.4.5) and application cursor keys mode (see section 4.4.4) alter the behaviour of the keypad and cursor keys. Some applications enable these modes but then do not deal correctly with the modified keys. You can force these modes to be permanently disabled no matter what the server tries to do.
4.6.2 Disabling -style mouse reporting
PuTTY allows the server to send control codes that let it take over the mouse and use it for purposes other than copy and paste. Applications which use this feature include the text-mode web browser , the Usenet newsreader version 4, and the file manager (Midnight Commander).
If you find this feature inconvenient, you can disable it using the ‘Disable xterm-style mouse reporting’ control. With this box ticked, the mouse will always do copy and paste in the normal way.
Note that even if the application takes over the mouse, you can still manage PuTTY's copy and paste by holding down the Shift key while you select and paste, unless you have deliberately turned this feature off (see section 4.11.3).
4.6.3 Disabling remote terminal resizing
PuTTY has the ability to change the terminal's size and position in response to commands from the server. If you find PuTTY is doing this unexpectedly or inconveniently, you can tell PuTTY not to respond to those server commands.
4.6.4 Disabling switching to the alternate screen
Many terminals, including PuTTY, support an ‘alternate screen’. This is the same size as the ordinary terminal screen, but separate. Typically a screen-based program such as a text editor might switch the terminal to the alternate screen before starting up. Then at the end of the run, it switches back to the primary screen, and you see the screen contents just as they were before starting the editor.
Some people prefer this not to happen. If you want your editor to run in the same screen as the rest of your terminal activity, you can disable the alternate screen feature completely.
4.6.5 Disabling remote window title changing
PuTTY has the ability to change the window title in response to commands from the server. If you find PuTTY is doing this unexpectedly or inconveniently, you can tell PuTTY not to respond to those server commands.
4.6.6 Response to remote window title querying
PuTTY can optionally provide the xterm service of allowing server applications to find out the local window title. This feature is disabled by default, but you can turn it on if you really want it.
NOTE that this feature is a potential security hazard. If a malicious application can write data to your terminal (for example, if you merely a file owned by someone else on the server machine), it can change your window title (unless you have disabled this as mentioned in section 4.6.5) and then use this service to have the new window title sent back to the server as if typed at the keyboard. This allows an attacker to fake keypresses and potentially cause your server-side applications to do things you didn't want. Therefore this feature is disabled by default, and we recommend you do not set it to ‘Window title’ unless you really know what you are doing.
There are three settings for this option:
- ‘None’
- PuTTY makes no response whatsoever to the relevant escape sequence. This may upset server-side software that is expecting some sort of response.
- ‘Empty string’
- PuTTY makes a well-formed response, but leaves it blank. Thus, server-side software that expects a response is kept happy, but an attacker cannot influence the response string. This is probably the setting you want if you have no better ideas.
- ‘Window title’
- PuTTY responds with the actual window title. This is dangerous for the reasons described above.
4.6.7 Disabling remote scrollback clearing
PuTTY has the ability to clear the terminal's scrollback buffer in response to a command from the server. If you find PuTTY is doing this unexpectedly or inconveniently, you can tell PuTTY not to respond to that server command.
4.6.8 Disabling destructive backspace
Normally, when PuTTY receives character 127 (^?) from the server, it will perform a ‘destructive backspace’: move the cursor one space left and delete the character under it. This can apparently cause problems in some applications, so PuTTY provides the ability to configure character 127 to perform a normal backspace (without deleting a character) instead.
4.6.9 Disabling remote character set configuration
PuTTY has the ability to change its character set configuration in response to commands from the server. Some programs send these commands unexpectedly or inconveniently. In particular, BitchX (an IRC client) seems to have a habit of reconfiguring the character set to something other than the user intended.
If you find that accented characters are not showing up the way you expect them to, particularly if you're running BitchX, you could try disabling the remote character set configuration commands.
4.6.10 Disabling Arabic text shaping
PuTTY supports shaping of Arabic text, which means that if your server sends text written in the basic Unicode Arabic alphabet then it will convert it to the correct display forms before printing it on the screen.
If you are using full-screen software which was not expecting this to happen (especially if you are not an Arabic speaker and you unexpectedly find yourself dealing with Arabic text files in applications which are not Arabic-aware), you might find that the display becomes corrupted. By ticking this box, you can disable Arabic text shaping so that PuTTY displays precisely the characters it is told to display.
You may also find you need to disable bidirectional text display; see section 4.6.11.
4.6.11 Disabling bidirectional text display
PuTTY supports bidirectional text display, which means that if your server sends text written in a language which is usually displayed from right to left (such as Arabic or Hebrew) then PuTTY will automatically flip it round so that it is displayed in the right direction on the screen.
If you are using full-screen software which was not expecting this to happen (especially if you are not an Arabic speaker and you unexpectedly find yourself dealing with Arabic text files in applications which are not Arabic-aware), you might find that the display becomes corrupted. By ticking this box, you can disable bidirectional text display, so that PuTTY displays text from left to right in all situations.
You may also find you need to disable Arabic text shaping; see section 4.6.10.
4.7 The Window panel
The Window configuration panel allows you to control aspects of the PuTTY window.
4.7.1 Setting the size of the PuTTY window
The ‘Columns’ and ‘Rows’ boxes let you set the PuTTY window to a precise size. Of course you can also drag the window to a new size while a session is running.
4.7.2 What to do when the window is resized
These options allow you to control what happens when the user tries to resize the PuTTY window using its window furniture.
There are four options here:
- ‘Change the number of rows and columns’: the font size will not change. (This is the default.)
- ‘Change the size of the font’: the number of rows and columns in the terminal will stay the same, and the font size will change.
- ‘Change font size when maximised’: when the window is resized, the number of rows and columns will change, except when the window is maximised (or restored), when the font size will change. (In this mode, holding down the Alt key while resizing will also cause the font size to change.)
- ‘Forbid resizing completely’: the terminal will refuse to be resized at all.
4.7.3 Controlling scrollback
These options let you configure the way PuTTY keeps text after it scrolls off the top of the screen (see section 3.1.2).
The ‘Lines of scrollback’ box lets you configure how many lines of text PuTTY keeps. The ‘Display scrollbar’ options allow you to hide the scrollbar (although you can still view the scrollback using the keyboard as described in section 3.1.2). You can separately configure whether the scrollbar is shown in full-screen mode and in normal modes.
If you are viewing part of the scrollback when the server sends more text to PuTTY, the screen will revert to showing the current terminal contents. You can disable this behaviour by turning off ‘Reset scrollback on display activity’. You can also make the screen revert when you press a key, by turning on ‘Reset scrollback on keypress’.
4.7.4 ‘Push erased text into scrollback’
When this option is enabled, the contents of the terminal screen will be pushed into the scrollback when a server-side application clears the screen, so that your scrollback will contain a better record of what was on your screen in the past.
If the application switches to the alternate screen (see section 4.6.4 for more about this), then the contents of the primary screen will be visible in the scrollback until the application switches back again.
This option is enabled by default.
4.8 The Appearance panel
The Appearance configuration panel allows you to control aspects of the appearance of PuTTY's window.
4.8.1 Controlling the appearance of the cursor
The ‘Cursor appearance’ option lets you configure the cursor to be a block, an underline, or a vertical line. A block cursor becomes an empty box when the window loses focus; an underline or a vertical line becomes dotted.
The ‘Cursor blinks’ option makes the cursor blink on and off. This works in any of the cursor modes.
4.8.2 Controlling the font used in the terminal window
This option allows you to choose what font, in what size, the PuTTY terminal window uses to display the text in the session.
By default, you will be offered a choice from all the fixed-width fonts installed on the system, since VT100-style terminal handling expects a fixed-width font. If you tick the box marked ‘Allow selection of variable-pitch fonts’, however, PuTTY will offer variable-width fonts as well: if you select one of these, the font will be coerced into fixed-size character cells, which will probably not look very good (but can work OK with some fonts).
4.8.3 ‘Hide mouse pointer when typing in window’
If you enable this option, the mouse pointer will disappear if the PuTTY window is selected and you press a key. This way, it will not obscure any of the text in the window while you work in your session. As soon as you move the mouse, the pointer will reappear.
This option is disabled by default, so the mouse pointer remains visible at all times.
4.8.4 Controlling the window border
PuTTY allows you to configure the appearance of the window border to some extent.
The checkbox marked ‘Sunken-edge border’ changes the appearance of the window border to something more like a DOS box: the inside edge of the border is highlighted as if it sank down to meet the surface inside the window. This makes the border a little bit thicker as well. It's hard to describe well. Try it and see if you like it.
You can also configure a completely blank gap between the text in the window and the border, using the ‘Gap between text and window edge’ control. By default this is set at one pixel. You can reduce it to zero, or increase it further.
4.9 The Behaviour panel
The Behaviour configuration panel allows you to control aspects of the behaviour of PuTTY's window.
4.9.1 Controlling the window title
The ‘Window title’ edit box allows you to set the title of the PuTTY window. By default the window title will contain the host name followed by ‘PuTTY’, for example . If you want a different window title, this is where to set it.
PuTTY allows the server to send control sequences which modify the title of the window in mid-session (unless this is disabled - see section 4.6.5); the title string set here is therefore only the initial window title.
As well as the window title, there is also an sequence to modify the title of the window's icon. This makes sense in a windowing system where the window becomes an icon when minimised, such as Windows 3.1 or most X Window System setups; but in the Windows 95-like user interface it isn't as applicable.
By default, PuTTY only uses the server-supplied window title, and ignores the icon title entirely. If for some reason you want to see both titles, check the box marked ‘Separate window and icon titles’. If you do this, PuTTY's window title and Taskbar caption will change into the server-supplied icon title if you minimise the PuTTY window, and change back to the server-supplied window title if you restore it. (If the server has not bothered to supply a window or icon title, none of this will happen.)
4.9.2 ‘Warn before closing window’
If you press the Close button in a PuTTY window that contains a running session, PuTTY will put up a warning window asking if you really meant to close the window. A window whose session has already terminated can always be closed without a warning.
If you want to be able to close a window quickly, you can disable the ‘Warn before closing window’ option.
4.9.3 ‘Window closes on ALT-F4’
By default, pressing ALT-F4 causes the window to close (or a warning box to appear; see section 4.9.2). If you disable the ‘Window closes on ALT-F4’ option, then pressing ALT-F4 will simply send a key sequence to the server.
4.9.4 ‘System menu appears on ALT-Space’
If this option is enabled, then pressing ALT-Space will bring up the PuTTY window's menu, like clicking on the top left corner. If it is disabled, then pressing ALT-Space will just send to the server.
Some accessibility programs for Windows may need this option enabling to be able to control PuTTY's window successfully. For instance, Dragon NaturallySpeaking requires it both to open the system menu via voice, and to close, minimise, maximise and restore the window.
4.9.5 ‘System menu appears on Alt alone’
If this option is enabled, then pressing and releasing ALT will bring up the PuTTY window's menu, like clicking on the top left corner. If it is disabled, then pressing and releasing ALT will have no effect.
4.9.6 ‘Ensure window is always on top’
If this option is enabled, the PuTTY window will stay on top of all other windows.
4.9.7 ‘Full screen on Alt-Enter’
If this option is enabled, then pressing Alt-Enter will cause the PuTTY window to become full-screen. Pressing Alt-Enter again will restore the previous window size.
The full-screen feature is also available from the System menu, even when it is configured not to be available on the Alt-Enter key. See section 3.1.3.7.
4.10 The Translation panel
The Translation configuration panel allows you to control the translation between the character set understood by the server and the character set understood by PuTTY.
4.10.1 Controlling character set translation
During an interactive session, PuTTY receives a stream of 8-bit bytes from the server, and in order to display them on the screen it needs to know what character set to interpret them in. Similarly, PuTTY needs to know how to translate your keystrokes into the encoding the server expects. Unfortunately, there is no satisfactory mechanism for PuTTY and the server to communicate this information, so it must usually be manually configured.
There are a lot of character sets to choose from. The ‘Remote character set’ option lets you select one.
By default PuTTY will use the UTF-8 encoding of Unicode, which can represent pretty much any character; data coming from the server is interpreted as UTF-8, and keystrokes are sent UTF-8 encoded. This is what most modern distributions of Linux will expect by default. However, if this is wrong for your server, you can select a different character set using this control.
A few other notable character sets are:
- The ISO-8859 series are all standard character sets that include various accented characters appropriate for different sets of languages.
- The Win125x series are defined by Microsoft, for similar purposes. In particular Win1252 is almost equivalent to ISO-8859-1, but contains a few extra characters such as matched quotes and the Euro symbol.
- If you want the old IBM PC character set with block graphics and line-drawing characters, you can select ‘CP437’.
If you need support for a numeric code page which is not listed in the drop-down list, such as code page 866, then you can try entering its name manually ( for example) in the list box. If the underlying version of Windows has the appropriate translation table installed, PuTTY will use it.
4.10.2 ‘Treat CJK ambiguous characters as wide’
There are some Unicode characters whose width is not well-defined. In most contexts, such characters should be treated as single-width for the purposes of wrapping and so on; however, in some CJK contexts, they are better treated as double-width for historical reasons, and some server-side applications may expect them to be displayed as such. Setting this option will cause PuTTY to take the double-width interpretation.
If you use legacy CJK applications, and you find your lines are wrapping in the wrong places, or you are having other display problems, you might want to play with this setting.
This option only has any effect in UTF-8 mode (see section 4.10.1).
4.10.3 ‘Caps Lock acts as Cyrillic switch’
This feature allows you to switch between a US/UK keyboard layout and a Cyrillic keyboard layout by using the Caps Lock key, if you need to type (for example) Russian and English side by side in the same document.
Currently this feature is not expected to work properly if your native keyboard layout is not US or UK.
4.10.4 Controlling display of line-drawing characters
VT100-series terminals allow the server to send control sequences that shift temporarily into a separate character set for drawing simple lines and boxes. However, there are a variety of ways in which PuTTY can attempt to find appropriate characters, and the right one to use depends on the locally configured font. In general you should probably try lots of options until you find one that your particular font supports.
- ‘Use Unicode line drawing code points’ tries to use the box characters that are present in Unicode. For good Unicode-supporting fonts this is probably the most reliable and functional option.
- ‘Poor man's line drawing’ assumes that the font cannot generate the line and box characters at all, so it will use the , and characters to draw approximations to boxes. You should use this option if none of the other options works.
- ‘Font has XWindows encoding’ is for use with fonts that have a special encoding, where the lowest 32 character positions (below the ASCII printable range) contain the line-drawing characters. This is unlikely to be the case with any standard Windows font; it will probably only apply to custom-built fonts or fonts that have been automatically converted from the X Window System.
- ‘Use font in both ANSI and OEM modes’ tries to use the same font in two different character sets, to obtain a wider range of characters. This doesn't always work; some fonts claim to be a different size depending on which character set you try to use.
- ‘Use font in OEM mode only’ is more reliable than that, but can miss out other characters from the main character set.
4.10.5 Controlling copy and paste of line drawing characters
By default, when you copy and paste a piece of the PuTTY screen that contains VT100 line and box drawing characters, PuTTY will paste them in the form they appear on the screen: either Unicode line drawing code points, or the ‘poor man's’ line-drawing characters , and . The checkbox ‘Copy and paste VT100 line drawing chars as lqqqk’ disables this feature, so line-drawing characters will be pasted as the ASCII characters that were printed to produce them. This will typically mean they come out mostly as and , with a scattering of at the corners. This might be useful if you were trying to recreate the same box layout in another program, for example.
Note that this option only applies to line-drawing characters which were printed by using the VT100 mechanism. Line-drawing characters that were received as Unicode code points will paste as Unicode always.
4.11 The Selection panel
The Selection panel allows you to control the way copy and paste work in the PuTTY window.
4.11.1 Pasting in Rich Text Format
If you enable ‘Paste to clipboard in RTF as well as plain text’, PuTTY will write formatting information to the clipboard as well as the actual text you copy. The effect of this is that if you paste into (say) a word processor, the text will appear in the word processor in the same font, colour, and style (e.g. bold, underline) PuTTY was using to display it.
This option can easily be inconvenient, so by default it is disabled.
4.11.2 Changing the actions of the mouse buttons
PuTTY's copy and paste mechanism is by default modelled on the Unix application. The X Window System uses a three-button mouse, and the convention is that the left button selects, the right button extends an existing selection, and the middle button pastes.
Windows often only has two mouse buttons, so in PuTTY's default configuration (‘Compromise’), the right button pastes, and the middle button (if you have one) extends a selection.
If you have a three-button mouse and you are already used to the arrangement, you can select it using the ‘Action of mouse buttons’ control.
Alternatively, with the ‘Windows’ option selected, the middle button extends, and the right button brings up a context menu (on which one of the options is ‘Paste’). (This context menu is always available by holding down Ctrl and right-clicking, regardless of the setting of this option.)
4.11.3 ‘Shift overrides application's use of mouse’
PuTTY allows the server to send control codes that let it take over the mouse and use it for purposes other than copy and paste. Applications which use this feature include the text-mode web browser , the Usenet newsreader version 4, and the file manager (Midnight Commander).
When running one of these applications, pressing the mouse buttons no longer performs copy and paste. If you do need to copy and paste, you can still do so if you hold down Shift while you do your mouse clicks.
However, it is possible in theory for applications to even detect and make use of Shift + mouse clicks. We don't know of any applications that do this, but in case someone ever writes one, unchecking the ‘Shift overrides application's use of mouse’ checkbox will cause Shift + mouse clicks to go to the server as well (so that mouse-driven copy and paste will be completely disabled).
If you want to prevent the application from taking over the mouse at all, you can do this using the Features control panel; see section 4.6.2.
4.11.4 Default selection mode
As described in section 3.1.1, PuTTY has two modes of selecting text to be copied to the clipboard. In the default mode (‘Normal’), dragging the mouse from point A to point B selects to the end of the line containing A, all the lines in between, and from the very beginning of the line containing B. In the other mode (‘Rectangular block’), dragging the mouse between two points defines a rectangle, and everything within that rectangle is copied.
Normally, you have to hold down Alt while dragging the mouse to select a rectangular block. Using the ‘Default selection mode’ control, you can set rectangular selection as the default, and then you have to hold down Alt to get the normal behaviour.
4.11.5 Configuring word-by-word selection
PuTTY will select a word at a time in the terminal window if you double-click to begin the drag. This panel allows you to control precisely what is considered to be a word.
Each character is given a class, which is a small number (typically 0, 1 or 2). PuTTY considers a single word to be any number of adjacent characters in the same class. So by modifying the assignment of characters to classes, you can modify the word-by-word selection behaviour.
In the default configuration, the character classes are:
- Class 0 contains white space and control characters.
- Class 1 contains most punctuation.
- Class 2 contains letters, numbers and a few pieces of punctuation (the double quote, minus sign, period, forward slash and underscore).
So, for example, if you assign the symbol into character class 2, you will be able to select an e-mail address with just a double click.
In order to adjust these assignments, you start by selecting a group of characters in the list box. Then enter a class number in the edit box below, and press the ‘Set’ button.
This mechanism currently only covers ASCII characters, because it isn't feasible to expand the list to cover the whole of Unicode.
Character class definitions can be modified by control sequences sent by the server. This configuration option controls the default state, which will be restored when you reset the terminal (see section 3.1.3.6). However, if you modify this option in mid-session using ‘Change Settings’, it will take effect immediately.
4.12 The Colours panel
The Colours panel allows you to control PuTTY's use of colour.
4.12.1 ‘Allow terminal to specify ANSI colours’
This option is enabled by default. If it is disabled, PuTTY will ignore any control sequences sent by the server to request coloured text.
If you have a particularly garish application, you might want to turn this option off and make PuTTY only use the default foreground and background colours.
4.12.2 ‘Allow terminal to use xterm 256-colour mode’
This option is enabled by default. If it is disabled, PuTTY will ignore any control sequences sent by the server which use the extended 256-colour mode supported by recent versions of .
If you have an application which is supposed to use 256-colour mode and it isn't working, you may find you need to tell your server that your terminal supports 256 colours. On Unix, you do this by ensuring that the setting of describes a 256-colour-capable terminal. You can check this using a command such as :
If you do not see ‘’ in the output, you may need to change your terminal setting. On modern Linux machines, you could try ‘’.
4.12.3 ‘Indicate bolded text by changing...’
When the server sends a control sequence indicating that some text should be displayed in bold, PuTTY can handle this in several ways. It can either change the font for a bold version, or use the same font in a brighter colour, or it can do both (brighten the colour and embolden the font). This control lets you choose which.
By default bold is indicated by colour, so non-bold text is displayed in light grey and bold text is displayed in bright white (and similarly in other colours). If you change the setting to ‘The font’ box, bold and non-bold text will be displayed in the same colour, and instead the font will change to indicate the difference. If you select ‘Both’, the font and the colour will both change.
Some applications rely on ‘bold black’ being distinguishable from a black background; if you choose ‘The font’, their text may become invisible.
4.12.4 ‘Attempt to use logical palettes’
Logical palettes are a mechanism by which a Windows application running on an 8-bit colour display can select precisely the colours it wants instead of going with the Windows standard defaults.
If you are not getting the colours you ask for on an 8-bit display, you can try enabling this option. However, be warned that it's never worked very well.
4.12.5 ‘Use system colours’
Enabling this option will cause PuTTY to ignore the configured colours for ‘Default Background/Foreground’ and ‘Cursor Colour/Text’ (see section 4.12.6), instead going with the system-wide defaults.
Note that non-bold and bold text will be the same colour if this option is enabled. You might want to change to indicating bold text by font changes (see section 4.12.3).
4.12.6 Adjusting the colours in the terminal window
The main colour control allows you to specify exactly what colours things should be displayed in. To modify one of the PuTTY colours, use the list box to select which colour you want to modify. The RGB values for that colour will appear on the right-hand side of the list box. Now, if you press the ‘Modify’ button, you will be presented with a colour selector, in which you can choose a new colour to go in place of the old one. (You may also edit the RGB values directly in the edit boxes, if you wish; each value is an integer from 0 to 255.)
PuTTY allows you to set the cursor colour, the default foreground and background, and the precise shades of all the ANSI configurable colours (black, red, green, yellow, blue, magenta, cyan, and white). You can also modify the precise shades used for the bold versions of these colours; these are used to display bold text if you have chosen to indicate that by colour (see section 4.12.3), and can also be used if the server asks specifically to use them. (Note that ‘Default Bold Background’ is not the background colour used for bold text; it is only used if the server specifically asks for a bold background.)
4.13 The Connection panel
The Connection panel allows you to configure options that apply to more than one type of connection.
4.13.1 Using keepalives to prevent disconnection
What’s New in the Toggle Mouse v4.4.7 serial key or number?
Screen Shot

System Requirements for Toggle Mouse v4.4.7 serial key or number
- First, download the Toggle Mouse v4.4.7 serial key or number
-
You can download its setup from given links:

Toggle Mouse v4.4.7 serial key or number & Apps for Laptop & PC Free Download

Toggle Mouse v4.4.7 serial key or number& Free Download
